Showing posts with label sauce. Show all posts

July 8, 2011

MUSHROOM RAGU

Mushroom Ragu is a rich and hearty Mushroom Sauce that can be tossed with cooked Pasta, layered in a Lasagna to replace the Meat or ladled over creamy Polenta or steamed White Rice.  The Mushrooms give an earthy depth of flavor that allows the other key ingredients, like Garlic and Madeira Wine to shine in the background without dominating.   This delicious Ragu will become one of your go to comfort foods that can be a main course or a side dish to other hearty dishes like Meatloaf or Braised Beef Ribs.   Mushroom Ragu is a dish that makes Cooking The Amazing both easy and delicious.


Here is the recipe.


2 lbs.  Fresh Mixed Mushrooms, quartered
3 T Olive Oil
1 1/2 t  Sea Salt, fine grain
1 t  Fresh Ground Black Pepper
2 T Olive Oil
1 Large Yellow Onion, diced fine
2 Cloves Garlic, chopped fine
1/2 t Sea Salt
1/2 t Fresh Ground Black Pepper
1 t  Dried Thyme
1 t  Dried Oregano
1 c  Beef Stock
1/2 c  Madeira Wine
2 1/2 c  Tomato Sauce 


1.  Select at least two types of Mushrooms for a more in depth Mushroom flavor.  Crimini, Oyster, Shiitaki, Chanterelle or even White Button Mushrooms are widely available varieties.  Use a slightly damp cloth to clean your Mushrooms.  Never put mushrooms under water to clean them because they will become water logged and so will the dish you are making.  Mushrooms absorb liquids easily.  After cleaning, quarter the Mushrooms lengthwise.


2.  Heat 3 T of Olive Oil in a large deep pan over medium heat.  Add the Mushrooms in 2-3 batches, avoiding over crowding the pan, and saute until browned and crisp, about 7-10 mins per batch.  Season with Sea Salt and Black Pepper as they saute. Over crowding leads to steaming and changes the taste of the dish in the end.  Set aside on a large plate once sauteed.


3.  In the same pan heat up 2 T Olive Oil and add a finely diced medium Yellow Onion and saute until translucent and soft, about 6-8 minutes.  Then add the finely chopped Garlic, Sea Salt, Black Pepper, Thyme and Oregano and saute for 1 minute more.

4.  Deglaze the pan with Madeira Wine increasing the heat to medium high and bringing to a boil.  Once at a boil add the Beef Stock.  Reduce heat to medium low and simmer then add the Tomato Sauce  and stir in well.  Simmer with the lid off until and reduce, about 7-10 minutes.   The Sauce should coat the back of a spoon.  This concentrates the flavors and thickens the Sauce.  Taste the Sauce and add Sea Salt or Black Pepper if needed.  Be sure to use a very good flavorful Tomato Sauce because it is a dominant flavor.

5.  Add the Mushrooms back to the Sauce and mix in well.   Simmer for 5 minutes.  The Ragu should be thick.  Taste again, and add any Sea Salt or Black Pepper if needed then serve.
COPYRIGHT (c) 2011

April 7, 2011

BAKED HAM WITH MAPLE CHERRY GLAZE


Sunday dinner and your holiday table will never be the same with this amazing Baked Ham glistening in a sweet Maple Cherry Glaze.  The Glaze perfectly balances the smokey saltiness of the Apple Cider Baked Ham.  I also use a good quality bone-in Ham that is also skinless for the best flavor and ease of cooking.  For a unique flavor and to ensure moisture I bake the Ham first in Apple Cider and then glaze it with delicious a glaze of Maple Syrup and Cherry Preserves.  When you are Cooking The Amazing it doesn't have to be Easter Sunday or Christmas dinner to serve the most delicious Baked Ham.


 Here is the recipe.


HAM
1  10-12 lb.  Fully Cooked Ham, bone-in and skinless
2 c  Apple Cider (or Apple Juice)


MAPLE CHERRY GLAZE
1/2 c  Maple Syrup
2  12 oz  Jars Cherry Preserves (Smuckers)
4 T  Dijon Mustard
1 1/2 c  Dark Brown Sugar
1 t  Ground Cinnamon
1 t  Fresh Ground Black Pepper


1.  Preheat your oven to 375 degrees.  *NOTE that this Ham bakes for a total of  3-3 1/2 hrs. then rests for 20 mins. to help you to plan on when to serve it.


2.  Remove your Ham from the plastic and place it in a medium roasting pan.  Place the roasting pan on a cookie sheet for safe and ease of transfer to and from the oven later.  I use a disposable foil roasting pan that requires no clean up!  Place the Ham with the exposed meat side down and score the outer flesh with a knife in a criss cross pattern about 1/8th inch deep.  Don't cut too deep or the juices will escape leaving a dry Ham as it bakes.

3.  Pour 2 cups of Apple Cider (or Apple Juice) over the Ham.  Cover your ham in aluminum foil tightly.
4.  Bake in the oven at 375 degrees.  After the first 1 hour 20 minutes of baking, remove the Ham and baste it with the pan juices from the bottom of the pan.  Return to the oven covering again in foil. Repeat the basting 4 more times (basting every 20 minutes for the next 1 hour and 20 minutes of baking). Keep the Ham covered with the foil as it bakes between bastings.  After the last basting, return the Ham covered in foil to the oven for 20 more minutes. 
5.  During the last few minutes of baking, prepare the Glaze.  In a medium sauce pan, over medium heat, combine the Maple Syrup, two 12 oz. jars Cherry Preserves (I use Smucker's brand because it has whole Cherries in it), Dark Brown Sugar, Dijon Mustard, Cinnamon and Black Pepper.  Mix well and simmer for 5 minutes.
6.  The Sauce will become thick and glossy as it simmers.  Taste it and adjust to your liking.
7.  After the Ham has baked for a total of 3 hours covered, remove the ham from the oven and remove the foil.  Spoon off all the pan juices from the bottom of the roasting pan and discard.


8.  Then pour the Maple Cherry Glaze you made over the Ham.  Keep uncovered and return to the oven and bake for 30 minutes more, undisturbed, without basting at 375 degrees.  Watch the Ham close for burning of the Glaze.  It will get dark in some areas as the Glaze caramelizes.  This will be the best bits! Then remove from the oven and check the internal temperature which should register at least 140 degrees in the deepest part of the Ham (do not touch the bone) when done.  If it is not at 140 degrees yet, allow it to rest for the 20 minutes in step 9 and then recheck the temperature.  The temperature will continue to rise as it rests.  If it is still below 140 degrees, return to the oven for 15 minutes at 375 degrees.  Repeat as necessary until you've reached the right temperature.  Ham sizes and ovens will vary which may increase cooking time.
9. Once you are at 140 degrees, spoon any of the Glaze from the bottom of the pan over the Ham several times to coat it well.  Pour any extra into a serving bowl to serve with the Ham on the side.  Tent the Ham in foil and let it rest for 20 minutes on the counter to allow the juices to redistribute before slicing and serving.
   
COPYRIGHT (c) 2011

December 18, 2010

BANANA PINEAPPLE FOSTER


I must admit I have never had the real Banana's Foster, even after several visits to New Orleans.  I came up with this recipe many years ago when I was in Kenya and cooking dessert for a group of people using what was at hand.  I had a huge sweet and juicy Pineapple. (If you have never had a fresh Pineapple picked right from the plant grown along the Equator, you are missing one of Nature's most incredible treats!)  And plenty of Bananas.  I thought I was inventing a new dessert having never heard of Banana's Foster at the time.  I didn't have Rum or Vanilla Ice Cream in Africa but I remember the sauce being thick, luscious and amazing and all of us licking our plates clean.  Real Banana's Foster does not have Pineapple in it so this recipe is with a tropical twist.  The aroma, as it cooks, becomes intoxicating as the Brown Sugar and Butter melt laced with Cinnamon.  Try serving this over French Toast or Waffles for breakfast on a special weekend morning.  You don't have to be in Africa to be Cooking The Amazing, just the desire to eat an amazing dessert.


Here is the recipe.


        1     Stick Butter
1 3/4 c  Dark Brown Sugar
        1 t   Vanilla Extract
        1 t   Cinnamon
        1 pinch  Sea Salt, fine grain
    1/4 c  Orange Juice
 1 1/2 c  Pineapple Chunks
        3     Bananas, sliced thick
        3 T Rum (optional)
 Vanilla or Coconut Ice Cream


1.  You can use canned Pineapple for this recipe but a fresh Golden Pineapple tastes 100% better.  If using fresh, remove the outer skin and eyes and cut Pineapple into large 1 inch chunks.  Drain from the juice if canned and measure out 1 1/2 cups.  Set aside.  Here's how to peel a Pineapple safely.

Place the Pineapple on it's side and slice off bottom to make a flat surface to stand it on.  Then cut off the top prickly leaves.

Stand the Pineapple up and carve the outer skin down all around.  Remove any "eyes" that are left.
Cut the Pineapple in half down the middle (longways) so that the core is exposed.

Split each half into half again and then cut out the hard inner core and discard it.

Cut each piece into inch chunks and place in a bowl to collect any juices.


2.  Over medium heat in a large pan, melt the Butter and Dark Brown Sugar, Vanilla, Cinnamon, Sea Salt, and Orange juice.  Stir well until the Brown Sugar is melted, about 4 minutes.  If using Rum, add it now and simmer 1 minute.  Watch for flames in your pan!


3.  Add the Pineapple chunks and any juice that collected in the bowl and simmer for 4 minutes.  The Sauce may begin to boil.  Stir well.


4.  Slice the Bananas thick and fold them into the sauce.  Carefully stir them in so they do not break up and simmer for just 2 minutes then remove from the heat and serve over Ice Cream or Pound Cake immediately.  Cooking the Bananas too long will make them mushy.
Try Banana Pineapple Foster over my Brioche French Toast for an amazing breakfast instead of Berries or for an Amazing dessert serve hot over my fresh baked Banana Bread Muffins!


COPYRIGHT (c)  2010

November 13, 2010

PESTO

                      
                    PESTO

Summer is really Pesto time because that is when the Basil can be picked fresh in your backyard with that unmistakable summer garden taste. But you can make Pesto all year long using fresh Basil from the market.  Pesto is one of those simple recipes that the food processor does most of the work but because of the few ingredients they must be of high quality.  Use Parmigiano-Reggiano cheese for the most amazing flavored Pesto.  It is expensive but you only need a cup finely grated and it will elevate the flavor intensely.   Simply stated, you get out what you put in, as in most recipes.  Pesto can also be frozen in an air tight container with a drizzle of Olive Oil on top to protect the flavor and that vibrant green color. Use your delicious Pesto in cold Salads with fresh Mozzarella and Tomato and over hot Pastas.  It can be a used as a sauce for Fish, Shrimp, grilled Chicken or Steaks.  Spread it on toasted rustic Bread and serve with a fresh Green Salad.  There are many way to serve and enjoy fresh Pesto all of which will have you Cooking The Amazing.


Here is the recipe.


3 c  Fresh Basil, loosely packed (about 3 oz.)
3 oz  Pine Nuts, toasted
1 c  Parmesan Cheese, grated fine
2-3  Garlic Cloves, finely chopped
1/3 c  Extra Virgin Olive Oil
3/4 t  Sea Salt, fine grain
3/4 t  Black Pepper, fresh ground course
1 T  Lemon Juice, fresh squeezed


1.  Toast the Pine Nuts in a dry pan (no oil or butter) over medium heat until they turn lightly browned and you start to smell them cooking.  Watch them close, they burn very fast!  Keep them moving in the pan so they do not burn. Toasting brings out incredible flavor.  Taste one before toasting and after to see the amazing taste difference.  This takes about 5 mins.

Pine Nuts are pale and a little dull before toasting them.


After toasting they develop a rich nutty flavor that really improves the Pesto.

2.  Place the toasted Pine Nuts in the food processor.  As you prepare your other ingredients place them in the food processor fitted with a steel blade. Grate the Parmesan Cheese finely.  Finely chop the Garlic.  If you like more Garlic flavor use 3 cloves.  The food processor often can not chop Garlic fine and leaves large chunks so prechopping helps prevent this.  Add the Olive Oil and then squeeze the juice from a fresh Lemon and add 1 T of the juice.  Add the Sea Salt and Pepper.  On top place the fresh Basil with stems removed.

3.  Pulse in the food processor several times to get it going.  Scrape down the sides of the bowl often and then process until all the ingredients are well processed.  About 45 secs.  Taste the Pesto and adjust seasonings or add more Garlic or Lemon Juice if you prefer then reprocess a few seconds to remix.  Do not over process.

4.  Use immediately or refrigerate or freeze right away.  To store place in an air tight container and drizzle a thin layer of Olive Oil over the top to protect flavor and color.  Never cook Pesto over heat.  Always add it to something else that is hot to warm it through like Pasta and fold it in mixing well.


TIPS:  Serve your fresh Pesto over hot Pasta with grilled Shrimp and shaved Parmesan Cheese over top or serve cold in a Mozzarella Tomato Salad.   Toast slices of bread in the oven then spread a layer of Pesto then add fresh diced Tomatoes and shaved Parmesan Cheese as an appetizer or for lunch with Green Salad

COPYRIGHT (c) 2010

September 25, 2010

MADEIRA CHICKEN AND MUSHROOMS

BRAISED CHICKEN AND MUSHROOMS IN THYME MADEIRA SAUCE

For dinner tonight I made Braised Chicken and Mushrooms in a Thyme and Madeira Sauce served with Roasted Green Beans and Red Peppers with Garlic .  I used succulent Chicken thighs, skinless and with the bone in, instead of the obvious Chicken breasts which to me, are much more dry and less flavorful.  The bone provides moisture and flavor when you braise.  Don't let the term braise scare you away from this easy and delicious recipe.  Braising is simply browning in fat on the stove top then adding a liquid and simmering until tender in the oven or on the stove top.  The recipe is divided into easy to follow steps that result in a delicious dinner.   Fire up the stove and sharpen your knives and prepare to be Cooking The Amazing.


Here is the recipe.


2 lbs.  Chicken Thighs,  skinless, bone in
2 T  Butter, unsalted
2 T  Olive Oil, extra virgin
1 t   Sea Salt, fine grain
1 t  Black Pepper, fresh ground
2 t  Thyme, dried or fresh
4  Strips Bacon, smoked, cut in lardons (see below)
2  Shallots (or 1 medium yellow Onion), diced fine
3  Garlic Cloves, minced fine
1 T Flour, all purpose
1 1/2 lb  Mushrooms, sliced thick (such as Chanterell, Crimini, Oyster, or Mixture of Wild Mushrooms)
3 T Olive Oil, extra virgin
3 T Butter, unsalted
1 c  Madeira Wine
1 1/2 c  Chicken Stock
1 T  Chicken Base (such as Better Than Bouillon)
3 T  Thyme, fresh, leaves removed


STEP ONE:  GET ALL INGREDIENTS READY
1.  Measure out all the above ingredients and have them in order as needed for the recipe.  This is a crucial step for recipe success in all recipes.  It prevents leaving out ingredients and mistakes later.
Prep all Vegetables by slicing and dicing as directed. 
Cut Bacon into lardons (see below).  Your cooking process will go much smoother, I promise.  This is called mise un place, a  French cooking term meaning having everything in place and ready to use.
A good habit to get into. 

STEP TWO:  BROWN THE CHICKEN
2.  In a large pan heat 2 T Butter and 2 T Olive Oil until hot on medium high heat.  Add Chicken thighs allowing for plenty of room so they do not crowd the pan causing them to steam and not brown.  Add Salt and Pepper to the tops of the cooking Chicken.  Flip when the bottoms are brown, about 3-4 minutes.  Add Salt and Pepper and 2 t of Thyme to the browned side as the the other side cooks for 3-4 minutes.  When both sides are browned remove from the pan to a dish and set aside.  The Chicken will not be all the way cooked through at this stage.  Leave any oil in the pan for step two.  Remove the pan from the heat so the oil does not burn.

STEP THREE:  COOK THE BACON UNTIL CRISP
3.  Stack 4 strips of smoked Bacon and cut into 1/4 inch strips across.  This is a French cooking term called a lardon and is used to flavor and render fat for cooking.  In the pan the Chicken was in, heat the residual oil on medium high heat then add the Bacon strips and cook until crispy.  Then remove the pan from the heat and remove the Bacon to a paper towel lined dish to drain.
                 MAKING LARDONS

STEP FOUR:  SAUTE THE SHALLOTS AND GARLIC
4.  Dice the Shallots (or Onion) and Garlic into a fine dice.  In the same pan place back on medium (reduce from medium high) heat.  There should be 3 T Bacon fat left in the pan.  If not add  enough Olive Oil to make total of 3 T.  If more than 3 T, remove the extra oil.   Add the diced Shallots and cook for about 1 minute then add the Garlic and cook for about 30 secs.  Stir in 1 T of Flour and cook for 2 minutes continuously stirring to prevent burning.  The Shallots will begin to brown.  Remove pan from the heat.

STEP FIVE:  SAUTE THE MUSHROOMS
5.  In different large pan, heat 3 T Olive Oil and 3 T Butter in medium high heat and add the sliced Mushrooms and saute until beginning to brown and are cooked through.  You want the Mushrooms to brown and crisp.  This may take 15 mins or so.  Finish the braising sauce (step 6)  while the Mushrooms continue to saute.  Keep stirring the Mushrooms every minute or two while you make the sauce.

STEP SIX:  MAKE THE BRAISING SAUCE
6.  While the Mushrooms are sauteing, make the braising sauce.  Place the Shallots and Garlic pan back on medium high heat and add 1 c Madeira Wine and bring to the boil stirring constantly then add 1 1/2 c Chicken Stock and 1 T Chicken Base and allow to boil and thicken stirring constantly for 4 minutes.  Scrape any brown bits stuck to the bottom of the pan as you stir.  These brown bits are pure flavor and will improve the sauce.  The sauce will reduce and thicken and should coat the back of a spoon.


TIP:  Find Chicken Base near the Bouillon cubes or cans of Broth at the grocery.  It is a reduced meat paste that is full of flavor and Salt so always taste after using because it can make things very salty after reducing.  Don't use Bouillon cubes.  I use the brand Better Than Bouillon Organic that comes in a small jar.


STEP SEVEN:  ADD THE SAUTEED MUSHROOMS AND CHICKEN
7.  The Mushrooms should be sauteed by this point.  Add them to the sauce and reduce the heat to medium low and mix them in well.  Taste the sauce.  Add Salt and Pepper as needed.  Then place the Chicken thighs on top of the sauce and sprinkle with the 3 T of Fresh Thyme leaves and cover with a lid and braise for 20 minutes undisturbed.  The sauce should simmer and bubble slowly, not boil.  After 20 minutes taste the sauce again and correct for Salt and Pepper.  Cut into the largest piece of Chicken and be sure it is cooked through.  If not cover and continue to cook for 5 minutes more then recheck.
Serve over cooked Egg Noodles or Mashed Potatoes with Sauce spooned over liberally.


                       COPYRIGHT  (c)  2010

June 18, 2010

STRAWBERRY SAUCE


STRAWBERRY  SAUCE


With all those Strawberries you picked at your local farm or from your own patch you have to use them or freeze fast before they go bad.  Strawberry Sauce is one way to use up your berries if your freezer space is limited.  Strawberry Sauce makes everything taste better especially if it is a hot stack of Sunday Pancakes or a scoop or two of Vanilla Ice Cream.  Choose bright red firm Strawberries to make a smooth and thick sauce.  The sauce can also be used to make Strawberry Butter Cream Icing or drizzled over Pound Cake layered with fresh Whipped Cream and fresh sliced Strawberries for the best Strawberry Shortcake ever.   Blend it with Milk and Vanilla Ice Cream for an amazing Strawberry Shake.  You will be Cooking The Amazing with every sweet bite!


Here is the recipe.


2 lbs   Fresh Strawberries
1 1/4  c  Sugar
1 T   Lemon Juice, fresh


1.  Hull and chop fresh Strawberries and place in a large bowl.

2.  Pour in the Lemon Juice, fresh squeezed, and stir to distribute well.

3.  Add the sugar and stir well.  Cover with plastic wrap and allow to sit at room temperature for 2 hours.

4.  After 2 hours, stir well and place in a blender and blend until liquid.

5.  Taste for sweetness.  Fresh Strawberries vary in flavor and sweetness.   Add more sugar if needed or if too sweet add 2 T of cold water and reblend. 

6.  Strain through a fine strainer over a large bowl using a rubber spatula to force through leaving seeds behind. 

7.  Place in a medium sauce pan and on medium heat bring to a simmer for 10 minutes stirring frequently.

8.  Place simmered Strawberry Sauce in a glass jar and refrigerate for 4 hours before using for a thicker sauce or serve right away for a thinner warm sauce.

TIP:  Use this Strawberry Sauce drizzled over my rich Chocolate Cake  for the ultimate dessert.

                                Copyright (c) 2010


April 25, 2010

TOMATO SAUCE

         
                TOMATO  SAUCE


If you have a sweet Italian Grandma that has an old family recipe for Tomato Sauce then skip this recipe and make one of my Cake recipes instead.  Grandma Nonna wouldn't be happy if you messed with family tradition.  If you are like the rest of us that think of Ragu as your Italian Granny then this recipe is for you.  Tomato Sauce is a basic that is very easy to make and one that can be adapted to your specific tastes.  If you love garlic, add more.  Don't like garlic, leave it out.  Love lots of Mushrooms, add as much as you like.  It's your Tomato Sauce and when you make it your own, you are Cooking The Amazing.


Here is the recipe.


3 T  Olive Oil
4 T  Butter
1 Medium Yellow Onion, diced fine
6 Large Cloves of Garlic, finely minced
3 T  Dried Oregano
1 t   Dried Thyme
1/2 t  Fennel Seeds
2  cans of crushed Tomatoes, 28 oz. each
2 1/2 t   Sea Salt
2 t   Fresh Ground Black Pepper
1 1/2 c   Grated Parmesan Cheese
15  Fresh Basil Leaves

Optional: 1 t  Hot Pepper Flakes, 1 c  Sauteed Mushrooms, 3 T Capers, 1/2 c Kalamata Olives, chopped,  1 c chopped  Sauteed Red Bell Pepper,
 Meat Balls, or Cooked Ground Chuck or Italian Sausage.


1.  In a large pot place the Olive Oil and Butter over medium heat.  Once hot, add the chopped onions and saute for 6-8 minutes until the Onions are soft and translucent then add the garlic and all the dried herbs and Fennel Seeds.   Saute for 2 minutes.

2.  The best canned Tomatoes are San Marzano Italian Tomatoes.  They taste amazing but they cost a lot and are hard to find.  (Whole Foods stocks them.) I use them often but I also use a good quality imported Italian canned Tomato that I can get at most markets and the taste is very good.   Use crushed canned Tomatoes or whole ones that you crush yourself in the pan.  Crushed is just a lot easier.  Add the 2 cans of Crushed Tomatoes and stir well.  Watch for splattering!

3.  Add the Salt and Pepper and bring to a simmer.  Cover the pot part way to prevent sauce from flying all over your kitchen.

4.  Simmer for 40 mins on low heat then add the Parmesan Cheese and stir in well then simmer for 10 mins more.

5.  Add any Options at this stage during the 10 minute simmer above. 

6.  Add the fresh Basil just before serving.  Tear the Basil into pieces so it will not bruise.  Taste for seasoning and correct Salt and Pepper if needed at this stage then serve.

7.  If you are adding  Meat Balls, Italian Sausage or Ground Chuck, allow it to simmer in the sauce partially covered for 2 hours before adding the basil at the last minute before serving.

TIP: Allow the Meat Balls to simmer undisturbed to prevent breaking them up.  This long simmer will make them very tender and flavorful.  Click  HERE  for the recipe.


                                    COPYRIGHT  (c) 2010

December 5, 2009

GANACHE


The name sounds intimidating and so French.  Don't let that keep you from making one of the easiest and most delicious secrets in baking.  Ganache is that glossy frosting you see on fancy cakes, tarts, chocolate cupcakes, and cookies in bakeries.  It is also what truffle candies are made from.  Ganache is very versatile and used to fill desserts when whipped.  I use it to cover incredible brownies and mix it into whipped cream for amazing Chocolate Mousse.  You can add any flavoring you like to compliment whatever you are making such as peppermint extract, espresso, raspberry jam, orange extract, etc.   If you love chocolate, you can not live without Ganache!  After you taste this smooth, silky, creamy ganache you know you are Cooking The Amazing.


Here is the recipe.


12  oz.  Chocolate, semi-sweet
1 c  Heavy Cream
1 t  Vanilla Extract
1-3 t of Flavoring (optional, see step 7)


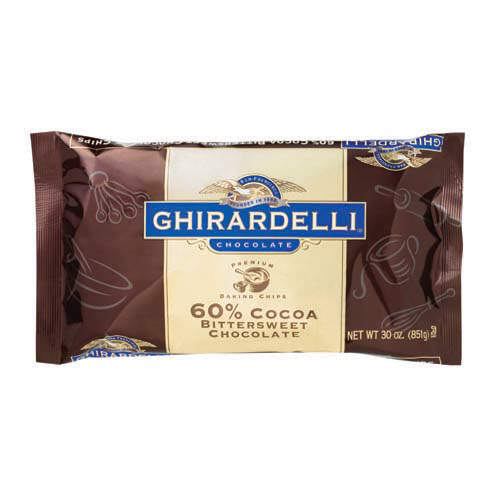
TIP:  Use high quality Chocolate.  Like Ghirardelli, Valrhona, Dove.  You can use Chocolate chips but the lesser quality brands contain stabilizers that will cause the ganache to not set properly.  You can buy the above brands in bars at most grocery stores.  Ghirardelli makes a great chocolate chip 60 % cocoa that works fine with this recipe. 


1.  Using a serrated knife, chop up the chocolate into small pieces or chocolate chips and place in a medium bowl.

2.  Bring the Heavy Cream to a slow boil on medium high heat.   Remove from heat as soon as it begins to boil.

3.  Pour the hot Heavy Cream over the chopped Chocolate in the bowl.  Use a rubber spatula, push the Chocolate below the surface of the hot Cream so it is completely covered.  Do not stir.
4.  Allow the hot Cream to sit on top of Chocolate for 5 minutes undisturbed.


5.  After 5 minutes, whisk the Cream into the Chocolate.  At first, the Chocolate and Cream will look grainy and a lumpy mess this is normal.  As you continue to whisk the Cream and Chocolate it will suddenly become very liquid and shiny.  Whisk until completely incorporated and all the chocolate is melted, approx 2 mins total. 

6.  Add the Vanilla Extract and mix well.  About 45 secs more whisking.

7.  If you are adding optional flavorings, add them with the Vanilla Extract.   Choose one Optional flavoring: 5-10  T  Seedless Raspberry Jam,  Seedless Blackberry Jam,  1 T Cognac,  1 T Espresso,  1  Orange Extract.  Or choose one of your own flavorings and adjust it to your own taste by adding more or less.


8.  If the Chocolate remains unmelted in small chunks after whisking, place the bowl of ganache into the microwave for 30 secs on high.  Remove and whisk until smooth and all chunks of Chocolate are melted.  If needed, microwave for 15 secs. more and whisk until smooth.  Your ganache is now ready for your recipe calling for ganache.


For an amazing chocolate mousse that melts into your mouth try my recipe here.


Or dip chocolate cupcakes into ganache and allow to set up at room temperature for a shiny smooth icing that is rich and amazing and very French.


 TIP:  Whisk slowly and avoid incorporating air into the mixture.  Rapid whisking will develop small air bubbles that will prevent it from pouring smooth.


COPYRIGHT (c) 2010