Showing posts with label baking. Show all posts

October 18, 2012

PUMPKIN CUPCAKES

Just when I thought I couldn't eat another Pumpkin flavored "anything", I quickly changed my mind as I thought of creating this recipe for Pumpkin Cupcakes.  The Pumpkin Puree makes these amazing Cupcakes super moist and flavorful.  Pumpkin almost always is accompanied by warm autumn Spices like Cinnamon, Nutmeg and Ginger to make it even more delicious.  Just when you thought you couldn't eat another Pumpkin flavored treat this time of year, you were Cooking The Amazing and Pumpkin never tasted so good.


Here is the recipe.


1 1/2  Sticks No Salt Butter Softened
1 c  Sugar
2/3 c  Dark Brown Sugar Packed
1/2 c  Sour Cream
15 0z. Can Of Pumpkin Puree
          (NOT Pumpkin Pie Mix)
1 c  Whole Milk
3 t  Vanilla Extract
3 Large Eggs
2 1/2 c  All Purpose Flour
2 t  Baking Soda
2 t  Baking Powder
1 t  Fine Grain Sea Salt
2 1/2 t  Ground Cinnamon
1 t  Ground Ginger
1/2 t  Ground Nutmeg
1/4 t  Ground All Spice
1/8 t  Ground Cloves

MAKES approximately 22-24 large Cupcakes.


1.  A lesson I leaned early on in baking is to measure out all the ingredients before I start.  Then I check them off from the ingredients list to be sure nothing is left out.  I learned this lesson the hard way... more than once. 

2.  PLAN AHEAD:  Soften your Butter at room temperature.   Soften the Butter and Cream Cheese for the Icing.  Place 22-24 large Cupcake liners in Muffin Tins.  Or for layer Cake cut 2 eight inch rounds of parchment paper and spray 2 eight inch pans with Nonstick Cooking Spray (Pam) placing the parchment rounds over the sprayed pan bottom and set aside.   I use extra large Cupcake liners from Reynold's brand.
3.  Preheat your oven to 350 degrees.  In a large bowl mix the softened Butter, Sugar and Brown Sugar for 4 minutes with a hand mixer or the paddle attachment of a Kitchen Aid mixer.  It will be grainy but it needs to become well mixed to keep the Cupcakes light.  4 minutes of mixing is important.
 
4.  Add, all at once, the Sour Cream, Canned Pumpkin Puree, Whole Milk, Vanilla Extract and 3 Large Eggs to the mixed Butter and Sugars.  Mix until well blended about 2 minutes.
 
5.  In another large bowl sift together the All Purpose Flour, Baking Powder, Baking Soda, Fine Sea Salt, Ground Cinnamon, Nutmeg, Ginger, All Spice and Cloves.  Be sure it is well mixed and sifted.
6.  Pour the dry sifted ingredients over the wet ingredients all at once and mix well, about 2 minutes.  Do not over mix.
7.  FOR CUPCAKES:  Scoop the batter using an Ice Cream scoop or spoon into the large Cupcake liners filling 1/2 way up.  Do not overfill or it will over flow during baking.  Bake at 350 degrees for 22-25 minutes, turning the trays 1/2 way through baking to get even baking.  Use a toothpick to test for doneness.   The toothpick should come out clean.  Do not over bake.
 

8.  FOR LAYER CAKE:  Spray with Nonstick Cooking Spray (Pam) and line with a round of parchment paper, two 8 inch cake pans and divide the batter evenly between the pans.  Bake at 350 degrees for 30-35 minutes, turning the pans 1/2 way through baking for even baking.  Use a toothpick to test for doneness. The toothpick should come out clean.  Do not over bake.  Ovens vary so you may need to adjust the time for your oven.

9.  Allow to cool completely in the pans before icing with Cream Cheese Icing.


CREAM CHEESE ICING


Here is the recipe.


2   Sticks No Salt Butter Softened
16 oz. Cream Cheese Softened (2 bars)
3 c   Powdered Sugar
4 t   Vanilla Extract
1/8 t   Almond Extract
1  pinch Fine Grain Sea Salt (very small pinch)


  1. Allow Butter and Cream Cheese to sit out until it is room temperature and softened, about 2 hours.
  2. In a large bowl, place the softened Butter.
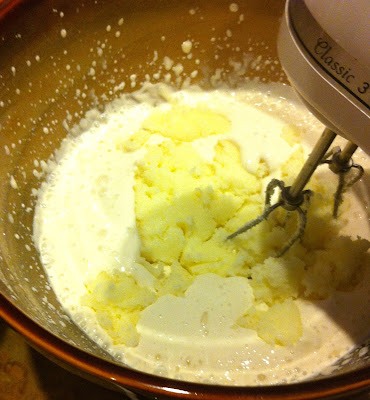
  3. Cream the Butter with a hand mixer for 2 minutes. Then add the Cream Cheese and cream for 2 minutes or so more.
  4. 1 cup at a time, add the Powdered Sugar and blend well.
  5. Add Salt, Vanilla and Almond Extracts and mix well. Taste and add more Powdered Sugar for more sweetness or more Cream Cheese to meet your own taste.
  6. Keep Cream Cheese Icing at room temperature for the best consistency to ice Cakes.
  7. Refrigerate unused icing. To use again, bring to room temperature then mix with a hand mixer for about 1 minute before using.
  8. OPTION: For those that like a very strong Cream Cheese taste add another 4 oz. of Cream Cheese for a more intense flavor.


COPYRIGHT (c) 2012

March 11, 2012

LEMON CURD

Lemon Curd is really the same thing as Lemon Pudding and can be used in many recipes interchangeably.  Lemon Curd is best when you use real Lemon Juice and Zest and not that processed Lemon Juice from one of those plastic Lemon things that we all have regrettably used.  I use this Lemon Curd in Tarts as the base for fresh Fruit or in Lemon Cakes between the layers or as the filling for Lemon Meringue Pie.  They are hard to find but if you can find Meyer Lemons use them in place if regular Lemons for an even more Amazing taste.  This Curd has a sweet tart fresh taste that is Amazing on Waffles and Scones.  When you are Cooking The Amazing you can make more than Lemonade with Lemons.


Here is the recipe.


1 1/4 c Sugar
1/3 c Corn Starch
1/4 t Fine Grain Sea Salt
6 Large Egg Yolks, Room Temperature
1 1/2 c Water
3/4 c Fresh Squeezed Lemon Juice
(about 2 1/2 Lemons)
2 T Fine Grated Fresh Lemon Zest
1 T Fresh Orange Juice
1/4 t  vanilla Extract
3 T  Butter, No Salt


1. In a medium pot off of the stove without any heat under it combine the 1 1/4 c Sugar, 1/3 c Corn Starch and 1/4 t Sea Salt. Whisk this mixture in the pot until well mixed. Later you will cook the lemon filling in this pot.
2. Separate 6 large Eggs (use room temperature Eggs). Use a fork and break up the 6 Egg Yolks well in a small bowl.


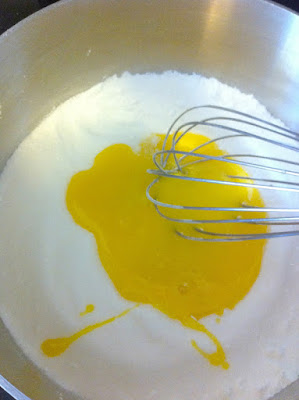
3. Add the 6 Egg Yolks into the pot of Sugar and Corn Starch mixture and whisk until you see no more Sugar. It will be thick and pasty. The heat is still off at this point.

4. Add 1 1/2 c Water to this mixture and whisk well until liquidy. It will foam up some. Turn the stove top heat on to Medium and place the pot over the heat and continuously whisk for 3-5 minutes until it begins to simmer and thicken.
5. Once it starts to thicken reduce the heat to low-medium and continuously whisk for about 5 minutes until it has become thick and uniform and the foam has subsided. This part happens quick and goes from not so thick to thick fast. It may bubble a lot and look lumpy. It is important to simmer and whisk scraping the bottom of the pot continuously so it does not scorch and it thoroughly cooks the Corn Starch. Otherwise, it will have a raw Corn Starch flavor when done. YUK! When done it will look like runny, lumpy Pudding. Remove from the heat and whisk until more smooth.
6. In a small bowl mix the Lemon Juice, Zest, Orange Juice and Vanilla Extract. Pour this into the pot and whisk well then add 3 T of Butter cut into small pieces. It will look separated and curdled at first then will come together. Whisk until uniform and smooth. There will be some lumpiness to the curd but it should feel smooth and silky despite the look of it.  You can strain it for a more refined texture through a fine mesh.  I like it unstrained which keeps the Lemon Zest front and center.  Refrigerate for at least 4 hours before using in your recipe or serve as a Lemon Pudding topped with fresh Whipped Cream.


Copyright (c) 2012

November 6, 2011

PUMPKIN PIE

Pumpkin Pie is always on the Thanksgiving table usually next to the overlooked Cranberry Sauce.  Bad Pumpkin Pie made with over baked dry Crust and thick and pasty Pumpkin Pie filling is usually what we all eat for dessert during the holidays.  It's usually store bought from the frozen section and we eat it because we think we are supposed to.  If frozen store bought Pumpkin Pie was delicious I would be all for it and buying them myself, but it just isn't.  Once you have had real homemade Pumpkin Pie in a flaky homemade Pie Crust you can never go back to nasty Pie again.  And it is so easy to make.  If you can use a hand mixer you can make this Pie.  If the homemade Pie Crust is scaring you then make it with a Graham Cracker Crust.   You can make Pumpkin Pie all year round not and just for the holidays especially when it is this easy and you are Cooking The Amazing.   


Here is the recipe.


or Graham Cracker Crust (recipe below)
2 Large Eggs, Room Temperature
1 Large Egg Yolk, Room Temperature
1/2 c  Dark Brown Sugar
1/4 c  Sugar
1/2 t  Fine Grain Sea Salt
2 t  Ground Cinnamon
1/4 t  Ground Nutmeg
1/4 t  Ground Cloves
1/2 t  Ground Ginger
1 can Pumpkin (15 oz.) (NOT PIE FILLING MIX)
1 1/2 c  Half And Half
1 t Vanilla Extract
1 T  Maple Syrup


1.  Plan Ahead:  Use my prebaked 9 inch deep dish Homemade Pie Crust or a very good store bought prebaked Pie Crust or for a twist use a Graham Cracker Pie Crust.  See the recipe for Graham Cracker Crust at the bottom.  Whatever you use make sure it tastes good.  Bad tasting Pie Crust will make a not so good Pie regardless how good the filling is.  Have your 9 inch Pie Crust (or Graham Cracker Crust recipe below) baked and cooled and ready to go before proceeding to the Pie filling.  Have your 3 Eggs at room temperature before making the Pie filling.  This makes a 9 inch deep dish Pie.

1.  Preheat your oven to 425 degrees.  Have a Cookie Sheet ready to place your 9 inch deep dish Pie pan on for ease of transfer and catch overflow in oven.  Bake in the center of your oven.

2.  In a large bowl place 2 large room temperature Eggs and 1 large room temperature Egg yolk.  Add the Brown Sugar, Sugar, Sea Salt and all the Spices.
Mix with a hand mixer on high until well incorporated.
3.  To this mixture add the 1 can Pumpkin and mix well with the hand mixer on high until well incorporated.
4.  Add the Half and Half, Vanilla Extract and Maple Syrup and mix well with the hand mixer on high.
5.  Place the Pie plate with the prebaked Pie Crust on a Cookie sheet for ease of transfer near your oven.  Pour the Pie filling into the prebaked Pie Crust.  Cover the Pie Crust edges with aluminum foil to protect it from burning while the Pie bakes.  Place in a 425 degree oven on the center rack.  Set timer for 15 minutes.  After baking for 15 minutes at 425 reduce the oven temperature to 350 degrees and continue to bake for 45-50 minutes or until the center is set. 
6.  Remove from the oven and allow to come to room temperature setting the Pie pan on a cooling rack for about 1 1/2- 2 hours.  Serve with my homemade Perfect Whipped Cream for the most Amazing dessert anytime of the year.


GRAHAM CRACKER CRUST

9 whole Graham Crackers, Honey Flavor (1 sleeve from a box of Graham Crackers)
1 T Sugar
1 T Brown Sugar
5 T Unsalted Butter, Melted
Pinch of  Fine Grain Sea Salt (omit Salt if you only have Salted Butter)
1/4 c Pecans, Chopped


TIP: Use 1 1/2 c of finely crushed Ginger Snaps in place of the Graham Crackers as another tasty option for the Crust.


1.  Preheat oven to 350 degrees.


2.  Place Graham Crackers in a large zip lock bag and close tight with all air out. Using a rolling pin or large heavy can, roll over the bag of Graham Crackers crushing them. Flip the bag over several times and crush until finely crushed and there are no large pieces.


3.  Pour crushed Crackers into a medium bowl. Remove any big pieces you missed while crushing and crush them and add them back.


4.  Add Pecans, Sugars and Salt and mix well with a fork until combined.


5.  Microwave Butter in a small bowl until melted, about 45 secs.


6.  Pour the melted Butter over the Graham Cracker mixture and with a fork combined, mixing well but keep it crumbly.


7.  Pour the Graham Cracker butter mixture into an 9 inch Pie pan and using your fingers, press it into the bottom of the pan going up the sides of the pan. Pack it firm against the pan.


8.  Bake Crust in a 350 degree oven for 5-7 minutes or until browned. Remove and cool on the counter while you prepare filling.


COPYRIGHT (c) 2011

November 3, 2011

HOMEMADE PIE CRUST


Whenever I eat a slice of Pie and the Pie Crust is dry and brittle and hard, it doesn't matter how good the Pie filling is, I don't want to finish it.  If a Pie Crust is flaky and tender with lots of Buttery flavor then that's the Pie I want to eat.  The secret to any flaky delicious Pie Crust is very cold Pastry Dough.  The Butter must stay cold until the second it hits the oven because it is the steam from the cold Butter that will cause the Crust to be Flaky and delicious.
This recipe is for a double 9 inch Pie Crust and uses a food processor.  You can also use a Pastry blender by hand as long as you follow the rule of keeping the Butter cold and not allowing the Butter to be broken down too small.  ALWAYS keep the Butter cold and in big pieces that you can see.  That is where the flavor is and Pie Crust perfection that follows.  And where there is flavor there is always Cooking the Amazing!


Here is the recipe.


2 1/2 c  All Purpose Flour
3/4 t  Fine Grain Sea Salt
3 t  Sugar (for Sweet Crust)
or
1/2 t  Sugar (for Savory Crust)
2 Sticks Frozen Butter, No-Salt
1/2 c Water with Ice Cubes Added

1 Egg (For Egg Wash)
1 T Water
Sugar To Sprinkle


1.  Prepare ahead.  This Pie Crust is easy to make when you use your food processor and takes about 5 minutes to make the Dough.  The Dough must be very cold when you bake it to get it to be flaky and tender.  Freeze the Butter ahead of time and take it out at the last minute.  Work the Dough in a cool area if possible.  If the Butter melts the Pie Crust will be less flaky.  Pour 1/2 c Water into a measuring cup then add 4-5 ice cubes and place in the freezer 5 minutes before needed.


2.  In the bowl of your food processor with the blade attachment put 2 1/2 c All Purpose Flour, 3/4 t  fine grain Sea Salt and 3 t Sugar.  Use 1/2 t of Sugar if you are making a savory dish like a Pot Pie or 3 t if you are making a sweet dish like Pumpkin Pie.  Pulse 10 times to combine well.
3.  Remove the Butter from the Freezer and cut each stick into small approximately 1/2 inch cubes using a sharp large knife.  Be careful because frozen Butter is hard to cut.  Take your time.  Place Butter cubes back into the freezer for 3 minutes until very cold again.  Remove from the freezer and place directly into the food processor over Flour mixture and pulse 6 times for 1 second each pulse.  Don't be tempted to pulse more.
4.  The Flour Butter mixture should look like there are small lumps in it and look coarse.
5.  Remove the Ice Water from the freezer and take out the Ice cubes.  Pour the cold Water through the shoot on top.  At the same time pulse for approximately 10-15 times 1 second each pulse.  The Dough will look coarse and like picture below.  You should be able to pinch a small amount and it holds together with your fingers.  If not, add 1 T more of Ice Water and pulse 1-2 seconds more.  Repeating this as needed until it does pinch together and hold.
 6.  Pour out the Dough mixture onto a lightly Floured surface and mound together pressing with both hands and gathering into one large lump.  It will be crumbly and will be loose in areas.  It won't look right, but it is.  You should see Butter pieces in the Dough.  This should take about 15 seconds.  If it looks like the Butter in the Dough is melting place it in the freezer for 5 minutes and then remove and begin where you left off.  (Warm melted Butter leads to an unflaky crust.)
 7.  Once in a big lump, cut in half.  Mold each half into a flat disc about 5 inches across using your hands and fingers (takes about 10 secs.) and wrap tight with plastic wrap.  If you plan on using the Dough today refrigerate for 2 hours before using.  Or freeze in a freezer bag over the plastic wrap for up to 60 days.  Thaw over night in the refrigerator before using for frozen Dough.
 8.  When ready to roll out your Pie Crust and use it, remove from the refrigerator and place the cold disc of Dough on a lightly Floured surface.  Roll with a lightly Floured rolling pin in one direction turning the Dough a quarter turn with each pass of the rolling pin.  DO NOT STRETCH THE DOUGH which will cause shrinkage of your Crust during baking.  Be gentle and keep it Floured to move it easily at all times.  Roll out in a rough circle approximately 1/8 th inch thick.  You want it about 2 inches larger than your Pie pan's top.  It is ok if the edges are rough as long as it is larger than your Pie pan and can overlap by 3 inches.  For a 9 inch Pie roll out at least 11 inches diameter.  Brush off excess Flour before placing the Dough onto the Pie Pan to shape.
  9.  Use your rolling pin to roll up the Pie Dough at one end.  Placing it on the edge of one end of the Pie pan and roll it out.  Adjust the Dough so it covers the entire Pie pan with overlap.  Allow the dough to fall into the well of the Pie Pan and gently press it in to form the shape of the pan.  Don't press too hard and DO NOT STRETCH IT.  If it tears or cracks do not worry.  Pinch or press together any tears in the Dough with your fingers to repair.  Use your thumb and forefinger to crimp the edge of the Dough and the forefinger of your other hand to make an indention in the crimp for the edges.   Use a fork to dock the bottom Crust so it won't puff up when baking.   Refrigerate the shaped Crust for 40 minutes before baking.  This helps the Dough relax and reduces shrinking.

 10. SINGLE CRUST PIE:  Blind bake the crust by placing a sheet of aluminum foil in the well of the cold Pie Crust after docking the bottom with a fork,  Add uncooked dried Beans as a weight.  Bake at 450 degrees for 10 minutes and remove the foil and dried Beans (save dried Beans to use again for another Pie Crust over and over).  Prick the sides and bottom again with a fork if any puffiness is noted and return to the oven for 5 more minutes.  Remove and brush the entire Crust with 1 Egg beaten with 1 T Water.  Sprinkle with Sugar all over and bake continue to bake at 450 until golden brown, about 4-7 more minutes.  Watch it closely, ovens vary so yours may brown sooner.  Remove and allow to cool before using in a recipe.  Follow your recipe's directions and bake with the filling from your recipe but cover the crimped Crust edges with a ring of aluminum foil to prevent a burnt or dark edges.   Use this for my delicious recipe for Pumpkin Pie.
 11.  DOUBLE CRUST PIE:  If you are using a top and bottom Crust Pie, fill your Pie with filling after the bottom Pie Crust is in place then place the top Crust over the filling and crimp edges of the bottom and top Crust together.  Cut 4 vent slits in the center of the top crust.   The last 20 minutes of baking: Beat 1 Egg with 1 T Water with a fork and brush the entire top surface with the Egg wash.  If it is a sweet Pie you are baking, sprinkle with Sugar.   Bake as directed by your recipe at whatever oven temperature is called for.  To prevent the edges from browning faster than the rest of the Pie, cover the crimped edges with a ring of aluminum foil during baking, leaving the center Pie Crust exposed, until the last 15 minutes and remove the aluminum foil ring and finish baking as directed by your recipe.


TIP:  Use left over Pie Crust Dough to make decorative leaves by cutting out a leaf shape with a small knife and using the back of the knife to make the leaf veins as in the main picture at the top.


Click here for my amazing Pumpkin Pie recipe.


COPYRIGHT (c) 2011

March 13, 2011

WHITE WEDDING CUPCAKES


I love white wedding Cake.  After all, it is the best part of the wedding.  You know, those long, drawn out ceremonies where everyone is stuffed in their frilly dresses and new stiff white shirts wishing the party would start and the sappy stuff would end.  The Wedding Cake at the end makes it all worth it.   This recipe is to satisfy those White Wedding Cake cravings at home.  White fluffy, moist Cake with creamy white Vanilla Butter Cream Icing doesn't have to wait for love birds to tie the knot to be eaten.  You can make it anytime, for any reason, even for your own love bird... or just for yourself to eat while you watch that old VHS video of your wedding.  You can make this into a layer cake with Raspberry Jam or Fresh Strawberries in between the layers for a delicious surprise.  Or, if you are like me, leave good enough alone and serve it pure, plain and all white.   When you are Cooking The Amazing, "it's a nice day for a white wedding...Cake."


Here is the recipe.


1 1/2  Sticks Butter, unsalted, softened
1 2/3 c  Sugar
1 c  Buttermilk
1 c  Sour Cream
2 t Vanilla Extract
2 t Almond Extract
6 Egg Whites, from large Eggs
1/4 t  Cream of Tarter
2 1/2 c  Cake Flour (You may substitute All Purpose Flour but will be slightly more dense)
2 t  Baking Powder
2 t  Baking Soda
1 t  Sea Salt, fine grain
Butter to grease pans


1. Preheat oven to 350 degrees. *Plan ahead: Use room temperature ingredients for the fluffiest Cake.


2. This can be made into a layer Cake.  Butter two 9 inch Cake pans then line with parchment paper rounds in the bottom. Butter the top of the parchment papers. Or for Cupcakes, place 22-24 Large Sized Cupcake liners in muffin tins.


3. In the bowl of a KitchenAid with a paddle attachment or large mixing bowl with a hand mixer, cream softened Butter and the Sugar for 4 minutes, scraping down the bowl frequently. It will be grainy.
4. To the creamed Butter and Sugar mixture add the Buttermilk, Sour Cream, Vanilla Extract and Almond Extract and mix well with a hand mixer or KitchenAid for about 3 minutes.   It will look curdled.
5. In a separate large bowl using a hand mixer, whip the Egg Whites and the Cream of Tarter into stiff peaks. About 3-4 minutes and set aside.
6. In a separate medium bowl (I know, another bowl to clean, but this Cake is worth it.) sift the Cake Flour, Baking Powder, Baking Soda, Sea Salt and then whisk well to combine. It is important to lighten the Flour by sifting and to make sure the Baking Soda and Powder are well distributed.
7. Pour the dry ingredients into the bowl of wet ingredients and mix for about 1 minute until no flour is seen. Be careful not to over mix.  Scrape down the bowl often.
8. Add 1/3 of the whipped Egg Whites to the mixture and mix in to lighten the batter using a rubber spatula. Then add the rest of the whipped Egg Whites and fold it in using a rubber spatula until incorporated well.

9. Pour cake batter mixture into the 2 prepared 9 inch cake pans divided equally and place into the center of the preheated oven and bake for 22-25 minutes or until a toothpick comes out clean from the center of the cake.  Check the the cake at 22 minutes.  If not done, place back into the oven and continue to bake checking again in 1 minute intervals until a toothpick comes out of the center of the cake clean.  The cake will be very pale lightly browned in color when done.  Rotate your pans half way through for even baking.


10. For Cupcakes, fill Cupcake liners 1/2 way up and bake for 19-22 minutes at 350 degrees until a toothpick comes out clean and tops are lightly browned. * Don't overfill liners or they will over flow.  Rotate the pans half way through.


11.  Allow to rest in the pan for 1 hour before removing to cool to room temperature. This is a very moist and fragile cake so handle with care.  Once cooled completely ice with Vanilla Butter Cream then dust with Powdered Sugar if desired.  To make it fun for kids add sprinkles.


VANILLA BUTTER CREAM


4 1/2 sticks Butter, unsalted, softened
5 c Powdered Sugar
1 T Milk
4 t Vanilla Extract
3-5 t Almond Extract
1 Pinch fine grain Sea Salt (very small pinch)

Total Prep Time: 5 minutes (except time to soften butter.)


1.  Allow Butter to sit out until it is room temperature until softened.

2.  In a large bowl, place the softened Butter.

3.  Cream the butter with a hand mixer for 1/2 minute.

4.  1 cup at a time, add the Powdered Sugar and blend well.

5.  In a small bowl, add Milk, Salt (very very small pinch), Vanilla and Almond Extracts and mix well. * Different brands of Almond Extract are stronger than others. Start off with 3 t mix well and taste and add 1 t at a time until you get what tastes best to you.

6.  Begin mixing the Butter and Powdered Sugar again and add the liquid Milk and Extract mixture until mixed in well, approx 2 mins.  Taste and add more Extracts as needed.

7.  Keep Butter Cream Icing at room temperature for the best consistency to ice cakes.

8.  Refrigerate unused icing. To use again, bring to room temperature then mix with a hand mixer for about 1 minute before using.

OTHER FLAVOR OPTIONS: Delete the Almond extract and add 3-6 tsp. of your favorite extracts like Peppermint or Coconut. Or add 1/2 c to 1 c of Raspberry Jam or Strawberry Jam for a delicious Icing.


TIP:  If you do not wish to use traditional Vanilla Butter Cream then choose the Icing of your choice to ice your Cake.   Butter Cream Icings are always a good choice, it's picking the flavor that's hard. 


Click HERE for amazing Butter Cream Icing recipes like Chocolate Butter Cream or Coconut Butter Cream.
For a delicious Cream Cheese Icing click HERE.
Or for a twist on tradition try dipping Cupcakes into dark rich Ganache or icing with Coconut Pecan Icing.


COPYRIGHT (c) 2011