Showing posts with label icing. Show all posts

March 13, 2011

WHITE WEDDING CUPCAKES


I love white wedding Cake.  After all, it is the best part of the wedding.  You know, those long, drawn out ceremonies where everyone is stuffed in their frilly dresses and new stiff white shirts wishing the party would start and the sappy stuff would end.  The Wedding Cake at the end makes it all worth it.   This recipe is to satisfy those White Wedding Cake cravings at home.  White fluffy, moist Cake with creamy white Vanilla Butter Cream Icing doesn't have to wait for love birds to tie the knot to be eaten.  You can make it anytime, for any reason, even for your own love bird... or just for yourself to eat while you watch that old VHS video of your wedding.  You can make this into a layer cake with Raspberry Jam or Fresh Strawberries in between the layers for a delicious surprise.  Or, if you are like me, leave good enough alone and serve it pure, plain and all white.   When you are Cooking The Amazing, "it's a nice day for a white wedding...Cake."


Here is the recipe.


1 1/2  Sticks Butter, unsalted, softened
1 2/3 c  Sugar
1 c  Buttermilk
1 c  Sour Cream
2 t Vanilla Extract
2 t Almond Extract
6 Egg Whites, from large Eggs
1/4 t  Cream of Tarter
2 1/2 c  Cake Flour (You may substitute All Purpose Flour but will be slightly more dense)
2 t  Baking Powder
2 t  Baking Soda
1 t  Sea Salt, fine grain
Butter to grease pans


1. Preheat oven to 350 degrees. *Plan ahead: Use room temperature ingredients for the fluffiest Cake.


2. This can be made into a layer Cake.  Butter two 9 inch Cake pans then line with parchment paper rounds in the bottom. Butter the top of the parchment papers. Or for Cupcakes, place 22-24 Large Sized Cupcake liners in muffin tins.


3. In the bowl of a KitchenAid with a paddle attachment or large mixing bowl with a hand mixer, cream softened Butter and the Sugar for 4 minutes, scraping down the bowl frequently. It will be grainy.
4. To the creamed Butter and Sugar mixture add the Buttermilk, Sour Cream, Vanilla Extract and Almond Extract and mix well with a hand mixer or KitchenAid for about 3 minutes.   It will look curdled.
5. In a separate large bowl using a hand mixer, whip the Egg Whites and the Cream of Tarter into stiff peaks. About 3-4 minutes and set aside.
6. In a separate medium bowl (I know, another bowl to clean, but this Cake is worth it.) sift the Cake Flour, Baking Powder, Baking Soda, Sea Salt and then whisk well to combine. It is important to lighten the Flour by sifting and to make sure the Baking Soda and Powder are well distributed.
7. Pour the dry ingredients into the bowl of wet ingredients and mix for about 1 minute until no flour is seen. Be careful not to over mix.  Scrape down the bowl often.
8. Add 1/3 of the whipped Egg Whites to the mixture and mix in to lighten the batter using a rubber spatula. Then add the rest of the whipped Egg Whites and fold it in using a rubber spatula until incorporated well.

9. Pour cake batter mixture into the 2 prepared 9 inch cake pans divided equally and place into the center of the preheated oven and bake for 22-25 minutes or until a toothpick comes out clean from the center of the cake.  Check the the cake at 22 minutes.  If not done, place back into the oven and continue to bake checking again in 1 minute intervals until a toothpick comes out of the center of the cake clean.  The cake will be very pale lightly browned in color when done.  Rotate your pans half way through for even baking.


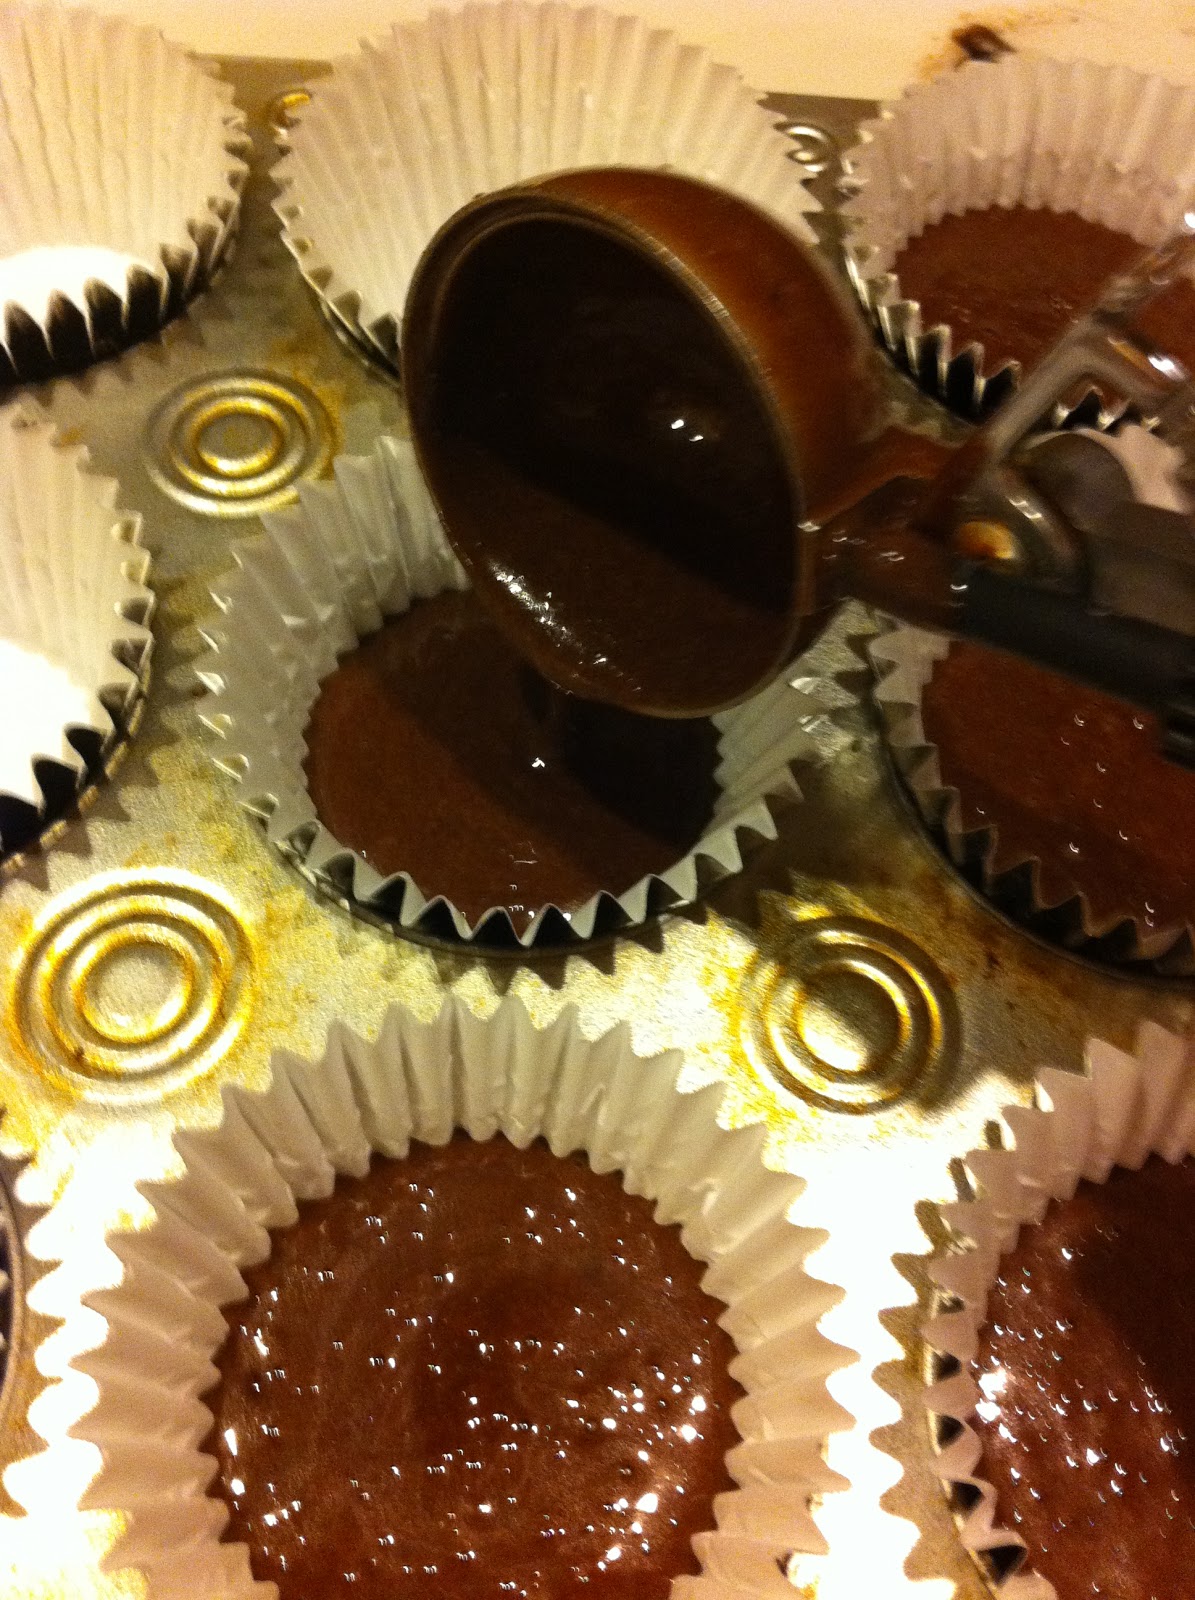
10. For Cupcakes, fill Cupcake liners 1/2 way up and bake for 19-22 minutes at 350 degrees until a toothpick comes out clean and tops are lightly browned. * Don't overfill liners or they will over flow.  Rotate the pans half way through.


11.  Allow to rest in the pan for 1 hour before removing to cool to room temperature. This is a very moist and fragile cake so handle with care.  Once cooled completely ice with Vanilla Butter Cream then dust with Powdered Sugar if desired.  To make it fun for kids add sprinkles.


VANILLA BUTTER CREAM


4 1/2 sticks Butter, unsalted, softened
5 c Powdered Sugar
1 T Milk
4 t Vanilla Extract
3-5 t Almond Extract
1 Pinch fine grain Sea Salt (very small pinch)

Total Prep Time: 5 minutes (except time to soften butter.)


1.  Allow Butter to sit out until it is room temperature until softened.

2.  In a large bowl, place the softened Butter.

3.  Cream the butter with a hand mixer for 1/2 minute.

4.  1 cup at a time, add the Powdered Sugar and blend well.

5.  In a small bowl, add Milk, Salt (very very small pinch), Vanilla and Almond Extracts and mix well. * Different brands of Almond Extract are stronger than others. Start off with 3 t mix well and taste and add 1 t at a time until you get what tastes best to you.

6.  Begin mixing the Butter and Powdered Sugar again and add the liquid Milk and Extract mixture until mixed in well, approx 2 mins.  Taste and add more Extracts as needed.

7.  Keep Butter Cream Icing at room temperature for the best consistency to ice cakes.

8.  Refrigerate unused icing. To use again, bring to room temperature then mix with a hand mixer for about 1 minute before using.

OTHER FLAVOR OPTIONS: Delete the Almond extract and add 3-6 tsp. of your favorite extracts like Peppermint or Coconut. Or add 1/2 c to 1 c of Raspberry Jam or Strawberry Jam for a delicious Icing.


TIP:  If you do not wish to use traditional Vanilla Butter Cream then choose the Icing of your choice to ice your Cake.   Butter Cream Icings are always a good choice, it's picking the flavor that's hard. 


Click HERE for amazing Butter Cream Icing recipes like Chocolate Butter Cream or Coconut Butter Cream.
For a delicious Cream Cheese Icing click HERE.
Or for a twist on tradition try dipping Cupcakes into dark rich Ganache or icing with Coconut Pecan Icing.


COPYRIGHT (c) 2011

October 8, 2010

CHOCOLATE MOUSSE CAKE


   CHOCOLATE  MOUSSE  CAKE

Chocolate, Chocolate and more Chocolate.  It's worth having a big butt for Chocolate, if you ask me.  This recipe has a few easy steps which will make the process easier.  It looks like a lot of work but when you break down the recipe into 5 steps it isn't so daunting and actually fun.  When you combine my amazing Chocolate Cake recipe with my incredible Chocolate Mousse you get the most irresistible Chocolate Mousse Cake.  It is beyond chocoholic bliss because it is covered in the ultimate Chocolate Ganache.  There is no such thing as too much of a good thing... is there?  Not when you are Cooking The Amazing!


Here is the recipe.


STEP 1:  Begin the Chocolate Mousse


12 oz Chocolate, chopped or chips (see below)
1 c Heavy Whipping Cream
1 t Vanilla Extract
1 pinch Sea Salt, fine grain (very small pinch)
2 c Heavy Whipping Cream
1 t Vanilla Extract
2 T  Powdered Sugar


1. PLAN AHEAD:  Make sure you have room in your refrigerator and freezer for chilling later. Have your Butter warmed to room temperature. Have your beaters and bowl and 2 c of Whipping Cream in freezer while you make the Ganache, the first part of your Chocolate Mousse.


2. In a large mixing bowl place 12 oz of very good Chocolate, chopped or in Chips. If your wallet is bursting then buy the best Chocolate like Valrhona, Callebaut or Lindt. There are amazing American Chocolates like Dove dark candy squares, which is my favorite to use and very reasonable, that you can chop into small chip sized pieces using a sharp serrated knife or use Ghirardelli 60% Cacao Chocolate Chips. 


3. Over medium high heat, bring 1 cup of Heavy Cream (Cream you buy to make Whipped Cream) to a gentle boil and poor the hot Cream over the Chocolate making sure all Chocolate is submerged. Use a rubber spatula to push the Chocolate below the hot Cream surface. This is the beginnings of Ganache. A fancy French cooking term for one of best things you'll ever eat!

4. Do not stir and allow to sit on the counter for 5 minutes undisturbed.


5. After 5 minutes, using a large spoon, whisk or rubber spatula, stir the Chocolate gently so that air is not incorporated into the Ganache. It will look grainy at first then become glossy and smooth very quickly. Be patient and keep stirring.

6. Once the Cream and Chocolate have come together add 1 t of Vanilla Extract and Sea Salt and incorporate gently until well mixed.  Place in the freezer to cool for 30 mins.  Later, you will finish the Mousse by adding Whipped Cream.  That step comes later but for now while the Ganache cools, make the Chocolate Cake before finishing the Chocolate Mousse.


STEP 2:  Make The Chocolate Cake


1 c  Baking Cocoa Powder
1 1/2 c  Sugar
1/2 c  Brown Sugar, dark, packed
1 3/4 c  Cake Flour (Can substitute all purpose flour)
1 t  Sea Salt, fine grain
1 1/4 t  Baking Soda
1 1/4 t  Baking Powder
3 large Eggs
1 c Buttermilk
1/2 c Sour Cream
1/2 c Vegetable Oil
1 T Vanilla Extract
Butter to grease cake pans


1. Butter 3, eight inch cake pans with 2 inch sides and line bottom with parchment paper, buttering the parchment paper on top also.

2. Plan ahead and get all ingredients measured and ready for the recipe.

3. Combine in a large bowl sift all the dry ingredients : Cocoa Powder, Sugar, Brown Sugar, Cake Flour, Baking Soda, Baking Powder, Salt. Then whisk until well combined.

4. Combine the Eggs, Buttermilk, Sour Cream, Oil, and Vanilla Extract in a medium bowl and mix well.  It will look curdled.


5. Add the dry ingredients to the Egg, Milk and Oil mixture then mix with the hand mixer for  1 minute, no longer. Over mixing creates a tough cake. The batter will be thin.

6. Let the mixed cake batter sit for 1 minute so the flour can absorb the liquid.

7. Pour the batter in even amounts into the prepared cake pans which should be on a cookie sheet for easy transfer.  Bake in center of the oven.

8. Bake for 30-35 mins. at 350 degrees or until a toothpick comes out clean.  Allow Cakes to cool in the pans on the counter top when done.  While the Cakes bake, finish the Chocolate Mousse in Step 3.


STEP 3:  Finish The Chocolate Mousse

 
1. Remove your chilled bowl and beaters and 2 c Heaving Whipping Cream from the freezer. Using a hand mixer or Kitchen Aid, whip the Heavy Cream with the 1 t of Vanilla Extract and 2 T Powdered Sugar into stiff peaks.


2. Remove the chilled Ganache.  It should be very thick and fudgy where a spoon will stand up in it.  If not put back in freezer for 10-15 mins more and recheck.  When it is thick whip with a hand mixer until fluffy and the color turns pale brown, about 3-4 minutes. I use the same beaters I just whipped the Cream with and don't bother wasting time to clean them. It all gets mixed together in the end anyway.


3. Spoon 1/3 rd of the Whipped Cream into the bowl of whipped Ganache and mix well with the mixer until completely incorporated. This will lighten it up.


4. Switch to a rubber spatula and fold in the rest of the Whipped Cream until well incorporated being careful not to deflate the Whipped Cream too much.


5.  Place the bowl of Chocolate Mousse on the counter to sit.  Continue to allow the Chocolate Cakes to cool on the counter in the pans.


Step 4:  Make The Ganache Icing


12 oz. Chocolate, semi-sweet chips or chunk
1 c Heavy Cream (1/2 pint/8 oz.)
1 t Vanilla Extract
2 T Butter, unsalted


1.  Using a serrated knife, chop up the chocolate into small pieces and place in a medium bowl if using chunk Chocolate.  Or place Chocolate Chips in the bowl.


2.  Bring the Heavy Cream to a slow boil on medium high heat in a medium pan . Remove from heat as soon as it begins to boil.


3.  Pour the hot Heavy Cream over the chopped Chocolate or chips in the bowl (see picture 1 below). Use a rubber spatula, push the Chocolate below the surface of the hot Cream so it is completely covered. Do not stir.


4.  Allow the hot Cream to sit on top of Chocolate for 5 minutes undisturbed.


5.  After 5 minutes, whisk the Cream into the Chocolate. At first, the Chocolate and Cream will look grainy and a lumpy mess (see picture 2 below) this is normal. As you continue to whisk the Cream and Chocolate it will suddenly become very liquid and shiny (see picture 3 below). Whisk until completely incorporated and all the chocolate is melted, approx 4 mins total.


6.  Add the Vanilla Extract and Butter and and mix well. About 45 secs more whisking.  Set aside.


Step 5:  Assemble the Chocolate Mousse Cake


1.  Remove one of the Chocolate Cakes and place on a cardboard cake round then on a wire rack over a cookie sheet with sides. (Cardboard cake rounds can be purchased at Michael's Craft Store your local Bakery and online).

2.  Place 1/3 rd of the Chocolate Mousse on top of the Chocolate Cake and spread it evenly to the edge.  Place the second layer of Chocolate Cake on top of the layer of Mousse and then top it with 1/3 rd of the Mousse, spread evenly to the edge.

3.  Place the last Cake layer upside down on top so that the flat bottom is the top.  The bottom of the Cake is flat and makes a nicer looking top when you pour on the Ganache.

4.  Using a butter knife or icing spatula, fill in the side of the cake with the last 1/3 rd of the Mousse evenly around all sides.

5.  Slowly pour the 1/3 rd of the  Ganache in the center of the top of the Cake and allow to run over the sides down into the cookie sheet below.  Repeat and pour another 1/3 rd of Ganache in the center of the cake and allow to run down the sides.

6.  Carefully lift the wire rack up and scrape the Ganache that has dripped onto the cookie sheet back into the Ganache bowl.  Place the wire rack with the cake back onto the cookie sheet.

7.  Pour all of the Ganache onto the center of the cake and allow to run over the sides.

8.  Allow the cake to sit at room temperature until it is set up approx. 1 hour.  Transfer with large spatulas to serving plate and serve at room temperature.


COPYRIGHT (c) 2010

July 29, 2010

GERMAN CHOCOLATE CAKE


German Chocolate Cake with thick buttery Coconut and Pecan Icing is a favorite choice for birthdays and special occasions.  Even people that do not like coconut want another piece of this ultimate classic cake.  There is a real difference making a cake and icing from scratch.  You'll appreciate how real this cake tastes compared to a box mix and tub of store bought frosting full of fake this and chemical that.  Yes, I am knocking Betty Crocker again.  Sure, those cakes taste ok and some even good but none taste Amazing.  Read the ingredients list next time you are at the store.  I'd rather die from butter overdose than some cancer I got from Miss Betty Crocker.    So, give Betty the night off.  And this is not the cake you make for your diabetic friend with blocked arteries.  It has lots of Butter, Sugar, Cream and Chocolate.  All the good things we love to eat and all the things that allow you to be Cooking The Amazing.


Here is the recipe.


COCONUT PECAN ICING

2 1/2 c  Pecans, chopped and toasted
2  Sticks  Butter, unsalted
2 c   Heavy Cream
6  Egg Yolks, large
1 c   Dark Brown Sugar
1 c   Sugar
1/4 t  Salt (preferably Fine Sea Salt)
2  t  Vanilla Extract
2 1/2 c   Sweetened Coconut Flakes

Total Cook and Prep Time about 17-20 mins not including cooling period.


TIP:  Make the Coconut Pecan Icing first so it has time to set up while the cake bakes and cools.


1.  In a dry saute pan over medium-low heat toast the Chopped Pecans until lightly browned and set aside to be added later.  About 5 minutes.

2.  In a large sauce pan over medium heat, melt 2 sticks of Butter.

3.  Lightly whisk 6 Egg Yolks in a medium bowl then add 2 c Heavy Cream and Brown Sugar and Sugar, Salt, and Vanilla Extract and mix until well combined with a large spoon or whisk.

4.  Pour the Egg and Cream mixture into the melted butter and stir constantly and rapidly over medium heat for 12 minutes (yes, I know, 12 mins.!) allowing it to come to a boil as it cooks.  The Icing will thicken and then seem to thin as it cooks and thicken again.  It will also get a darker color as it cooks.  After 12 minutes, if your arm has not fallen off, it should coat the back of a spoon.  It will seem very runny at this stage which is normal. Don't add flour or corn starch to thicken it, this is how it is suppose to be at this stage.  Remove from the heat.

5.  Add the Toasted Pecans and Coconut Flakes off the heat to the Icing and mix well then scrape icing into a large bowl to cool at room temperature while the cake bakes.  Allow to sit for 2 hours to set up and thicken at room temperature.  This is important. If you ice your cake too soon the layers will slide off with a thin icing.

6.  Bake Chocolate Cake recipe below. Allow the cakes to cool completely.  Ice your cake using 1/4 icing between each layer stopping about 1/4 inch from the edge.  Then ice the top then the sides and smooth out with a spatula.


CHOCOLATE CAKE

Here is the recipe.


1 c  Baking Cocoa Powder
1 1/2  c  Sugar
1/2  c  Brown Sugar, dark, packed
1 3/4 c  Cake Flour (Can substitute all purpose flour)
1 t  Fine Sea Salt
1 1/4 t  Baking Soda
1 1/4 t  Baking Powder
3  Eggs, large
2 c  Buttermilk
1/2 c  Sour Cream
1/2 c  Vegetable Oil
1 T  Vanilla Extract
Butter to grease cake pansTotal Prep and Cooking Time: Approx. 1 hr 10 mins


 1.  Preheat oven 350 degrees.


2.  Butter 3, eight inch cake pans and line bottom with parchment paper, buttering the parchment paper on top also. Or one 13 x 9 baking dish. Or to make cupcakes, use paper liners unbuttered. Darker metal cake pans cook best.


3.  Get all of your ingredients for the recipe measured and in place.  This will ensure no mistakes in measuring or forgetting an ingredient.

4.  Combine in a large bowl, all the dry ingredients :  Cocoa Powder, Sugar, Brown Sugar, Cake Flour, Baking Soda, Baking Powder, Salt. First sift them through a fine mesh strainer then whisk until well combined. 


5.  Combine the Eggs, Buttermilk, Sour Cream, Oil, and Vanilla Extract in a medium bowl and mix well.  Use room temperature ingredients for the fluffiest  Cake.


6.  Add  dry ingredients to the Egg, Milk and Oil mixture then mix with the hand mixer or KitchenAid for 1 minute, no longer. Over mixing creates a tough cake.  The batter will be thin. 


7.  Let the mixed cake batter sit for 1 minute so the flour can absorb the liquid.  It will look soupy and thin.


8.  Pour the batter in even amounts into the prepared cake pans which should be on a cookie sheet for easy transfer.  Bake in center of the oven.


9.  Bake for 30-35 mins. at 350 degrees or until a toothpick comes out clean. The 13 X 9 baking pan may need 5-10 mins longer. Cupcakes bake for 21-25 mins. ***Fill cupcake liners 1/2 full or they will over flow.*** Don't over bake.


10.  Allow to cool 60 minutes before removing from pans. And cool completely before icing. For best results in appearance refrigerate the cakes before icing for about 30 mins. This cake is very moist and fragile.  Hide cracks with icing.  The cakes when baked will only fill about 1/2 of the cake pan and not come to the top.


11.  Ice the layers and sides of cake with the prepared Coconut Pecan Icing and serve at room temperature.  See above.


                                        COPYRIGHT (c)  2010

January 7, 2010

CARROT CAKE


CARROT CAKE

Classic Carrot Cake with hints of cinnamon and clove made super moist by pineapple as a secret ingredient.  Carrot Cake is fast becoming the most requested cake for wedding cakes because of it's tasty universal appeal.  And with Carrots as the main ingredient you could even say it is healthy.  Well, almost.  When you ice it with my amazing Cream Cheese Icing you will have an incredible combination of flavors that are both classic and proof you are Cooking The Amazing.


Here is the recipe.


2 c   All Purpose Flour
1 1/2 c   Sugar
1/4 c   Brown Sugar, packed (dark or light)
1  1/2 t   Baking Soda
1 t   Baking Powder
1 t  Salt
4 t  Cinnamon
1/4 t  Nutmeg
1/8 t  Ground Cloves 
1/4 t  Ground Ginger
2 c  Finely Grated Peeled Carrot, packed
1 c  Coconut Flakes, sweetened
1 c  Raisins (Optional)
1 can 8 oz  Crushed Pineapple, drained
       (reserve 1 T of drained Pineapple juice)
1 1/2 c  Walnuts or Pecans, chopped small pieces
1 c  Vegetable Oil
2 t  Vanilla Extract
1 T  Finely Grated Fresh Orange Zest
3  Eggs, extra large
Pam non stick Cooking Spray

Total Prep and cooking time approx. 1 1/4 hr.
Total Cooling and Icing time approx. 2 1/2 hrs


  1. Preheat oven to 350 degrees.

  2. Prepare two 9 inch cake pans by spraying with Vegetable non-stick spray (like Pam Spray) and line with a parchment paper round on the bottom then spray the top of the parchment.  Or spray a 9 X 13 baking pan with Vegetable non stick spray (like Pam Spray) or use 20 jumbo Cupcake liners in a Muffin tin without using Pam spray.

  3. In a large bowl whisk well:  Flour, Sugar, Brown Sugar, Baking Soda, Baking Powder, Salt, all Spices.

  4. Peel then Grate approx 5-6 medium Carrots to yield 2 cups packed.  Grate Carrots finely to no more than 1/4 inch pieces.  Or process in a food processor until finely grated but not mush.  It is important that you peel the Carrots before grating.  You do not want the tough skins in your cake.

  5. In a medium bowl or KitchenAid bowl add Carrots, Grated Fresh Orange Peel, Drained Pineapple, Raisins (optional), Coconut Flakes, Walnuts or Pecans and mix well with a big spoon.

  6. To this mixture add the Vegetable Oil, Vanilla Extract and Eggs one at a time mixing in well then add 1 T of the reserved Pineapple juice and mix well.  Scrape down bowl often.

  7. Slowly add the wet ingredients to the dry ingredients and mix with a hand mixer or Kitchen Aid for  about 1 minute until well mixed.  Do not over mix.

  8. Pour divided into prepared (as above) 9 inch cake pans, or 9 X 13 pan, or approximately 20 Cupcake liners filled 3/4 full or a 9 X 13 baking sheet sprayed with Pam but no parchment paper needed. 

  9. Bake at 350 degrees for 25-30 mins for Cupcakes,  35-40 minutes for 9 inch layer cakes and 45-50 mins for 9 X 13 in the center of the oven.  Half way through cooking rotate the pans for even cooking.  A toothpick will come out clean when done.  All ovens vary in timing so check at lowest time first and if not done put back in oven and recheck in 2- 3 minutes.

  10. Allow to cool completely in pan for 1-2 hrs. before removing to ice with Cream Cheese Icing.  Recipe below.  Place 1/4 of icing between the two layers and when placing the top cake layer on, put the flat side of the cake (the bottom when it was in the cake pan) facing up for a flat top which makes a more attractive cake and easier to ice.

This cake is super moist and fragile so handle with care when removing from pans and icing.  If it breaks the icing will hide any imperfections.

TIP:  Add 1 cup of golden raisins or chopped dried cherries or apricots for a twist on tradition.

TIP:  Black Walnuts will give this cake the most flavor.  Sprinkle the top of the cake with Walnuts or Pecans as a tasty garnish.


CREAM CHEESE ICING


Here is the recipe.


2 sticks Butter, unsalted, softened
16 oz. Cream Cheese, softened (2 bars)
3 c Powdered Sugar
4 t Vanilla Extract
1/4 t Almond Extract
1 small pinch Salt (very small pinch)


Total Prep Time: 7 minutes (except time to soften butter and cream cheese.)


  1. Allow Butter and Cream Cheese to sit out until at room temperature and softened.
  2. In a large bowl, place the softened Butter.
  3. Cream the Butter with a hand mixer for 2 minutes. Then add the Cream Cheese and cream for 2 minutes or so more until well mixed.
  4. 1 cup at a time, add the Powdered Sugar and blend well.
  5. Add Salt, Vanilla and Almond Extracts and mix well.  Taste and add more Powdered Sugar to be more sweet or more Cream Cheese to suit your taste.
  6. Keep Cream Cheese Icing at room temperature for the best consistency to ice Cakes.
  7. Refrigerate unused icing. To use again, bring to room temperature then mix with a hand mixer for about 1 minute before using.
  8. OPTION: For those that like a very strong Cream Cheese taste add another 4 oz. of Cream Cheese for a more intense flavor.


COPYRIGHT (c) 2010


January 6, 2010

CREAM CHEESE ICING


CREAM CHEESE ICING


 A really good Cream Cheese Icing truly is the "Icing on the Cake".   This recipe is a version of my Butter Cream Icing that blends rich cream cheese into sweet Butter Cream with just the right amount of vanilla.  Cakes like Pumpkin Spice and Carrot traditionally are layered with Cream Cheese Icing to compliment their spice and richness.    Cooking The Amazing comes easy when a delicious icing takes just minutes and tastes better than you can imagine.


 Here is the recipe.


2   sticks Butter, unsalted, softened
16 oz. Cream Cheese, softened (2 bars)
3 c  Powdered Sugar
4 t  Vanilla Extract
1/8 t  Almond Extract
1 pinch  Salt (very small pinch)
Total Prep Time: 7 minutes (except time to soften butter and cream cheese.)


  1. Allow Butter and Cream Cheese to sit out until it is room temperature and softened.
  2. In a large bowl, place the softened Butter.
  3. Cream the Butter with a hand mixer for 2 minutes.  Then add the Cream Cheese and cream for 2 minutes or so more.
  4. 1 cup at a time, add the Powdered Sugar and blend well.
  5. Add Salt, Vanilla and Almond Extracts and mix well.  Taste and add more Powdered Sugar for more sweetness or more Cream Cheese to meet your own tastes.
  6. Keep Cream Cheese Icing at room temperature for the best consistency to ice cakes.
  7. Refrigerate unused icing. To use again, bring to room temperature then mix with a hand mixer for about 1 minute before using.
  8. OPTION:  For those that like a very strong Cream Cheese taste add another 4 oz. of Cream Cheese for a more intense flavor.


COPYRIGHT (C) 2010