November 30, 2010

ROAST TURKEY CASSEROLE

ROAST  TURKEY  CASSEROLE

It's the day after Thanksgiving or that big Christmas dinner and you have a lot of Roast Turkey left over that is just too good to put between two pieces of White Bread and eat as a Sandwich.  You can preserve that succulent Roast Turkey experience by combining sauteed Vegetables and a simple White Sauce with Parmesan Cheese to make an amazing Casserole.  You may have extra Vegetables that you did not use and Bread that is begging to be put to good use.  This recipe will recycle them all into a delicious creamy Casserole.  Thanksgiving may be over but when you are Cooking The Amazing you'll be thankful for leftovers.


Here is the recipe.


3 c  Cooked Egg Noodles
3 c  Cooked Roast Turkey, 1 inch cubed
6 T  Butter
1 T  Olive Oil
1 c  White Mushrooms, sliced
1 1/2 c  Yellow Onion, medium diced
1 1/2 c  Celery, sliced thin
3/4 c  Carrots, medium diced
2  Cloves of Garlic, finely minced
1 t   Sea Salt, fine grain
1 t  Black Ground Pepper
1 t  Dried Thyme
1 t  Poultry Seasoning
1 t  Old Bay Seasoning
1/4 c  All Purpose Flour
4 c  Whole Milk
1 T  Chicken Base
1 1/2 c  Parmesan Cheese, shredded
2 c  Sour Dough Bread, 1 inch cubed
1/2 c  Grated Parmesan Cheese


1.  Preheat oven to 350 degrees.  Place a large Dutch oven or deep casserole on a large cookie sheet for easy transfer to and from the oven. 

2.  Cook large sized Egg Noodles until just soft and drain well and reserve 3 cups.  Place the cooked Egg Noodles in the bottom of the Dutch oven.

3.  Pull large chunks of cooked Roast Turkey, both white and dark Meat from the bird and dice into large 1 inch pieces.  Place the diced Turkey in the baking dish with the Egg Noodles.
3.  In a large pan over medium heat saute the sliced Mushrooms in 6T Butter and 1 T Olive Oil until browned and crispy on edges.  This takes about about 8 minutes.  Remove the Mushrooms from the pan and add them to the baking dish with the other cooked ingredients.
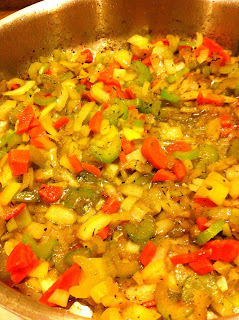
4.  In the same pan over medium heat saute the Onions, Celery and Carrots, adding more Olive Oil if needed to the pan, until the Onions are cooked and the Carrots and Celery are soft.  Then add the minced Garlic and saute 1 minute.

5.  Add the Sea Salt, Black pepper, Thyme, Poultry Seasoning and Old Bay and stir in the sauteed vegetables well.  Then add the 1/4 c of AP Flour and mix in well.  The Pan will look dry, the Vegetables will look cakey and the bottom of the pan will get a dry coating.  Cook the Flour, stirring constantly, for 2 minutes.
5.  Add the Milk and 1 T of Chicken Base (see note) and turn up the heat to medium high stirring constantly and bring to a boil.  Boil for 2 minutes continuing to stir rapidly and being sure to scrape the bottom of the pan well.  The sauce will thicken quickly.
 6.  After 2 minutes of boiling remove from the heat and add the 1 1/2 c shredded Parmesan Cheese.  Stir in well allowing to melt.
 7.  Taste for seasoning now.  Add more Salt or Pepper as needed and stir in well.  Add this sauce to the baking dish and fold gently into the other cooked ingredients until well combined.  Then top with 2 c Sour Dough Bread cubes (or Italian or French style Bread) then sprinkle 1/2 c of grated Parmesan Cheese over top and bake for 45 mins at 350 degrees in center of your oven uncovered.


8.  Allow to sit for 10 minutes once cooked before serving so the sauce can come together and it cools down.  It is like lava when just out of the oven.


TIP:  Chicken Base is a concentrated Chicken Stock used in restaurants to boost flavor of food.  It is used similarly to how you would use a Bouillon cube but is made from Meat and is natural.  I use Organic Better Than Bouillon brand.  Find it at the market near the Bouillon Cubes. 

COPYRIGHT (c) 2010

November 14, 2010

HOMEMADE GRAVY

I must confess that I would drink Gravy with a straw if I thought no one was looking.   And if the Gravy was really good I may not even care if someone was looking.  Sad, I know.  Seriously, can you imagine Mashed Potatoes without Gravy!  I mashed creamy Yukon Gold Potatoes in the photo above and ladled silky rich Turkey Gravy over them for dinner tonight.  Homemade Gravy has such a completely different taste than any powdered mix or stuff in a jar.  It has a depth of flavor and richness that does not compare.
To make homemade Gravy you need the roasting drippings or juice from roasted Chicken, Turkey, Pork or Beef.  For a flavorful and amazing tasting Gravy the roasted Meat should be roasted in a way that brings out it's true flavor.   So if you roast meat add cut up Carrots, Garlic, Herbs like Thyme, Celery and Onions to the bottom of the roasting pan before you roast to flavor the drippings.  Strain all of the cooked Vegetables out before making your gravy.  So break out those straws and start Cooking The Amazing because it is Gravy time!


Here is the recipe.


1  1/2 c  Roasted Meat Juices
1 c  Stock (Beef or Chicken) to deglaze
4 T  Butter
4 T  All Purpose Flour
3/4 t  Sea Salt, fine grain
3/4 t  Black Pepper, fresh ground
1 c  Stock (Chicken or Beef)
1/2 c  Milk, whole (optional)
1 t  Fresh Thyme


1.  PLAN AHEAD:  This recipe uses Meat drippings from roasted Meat like Beef, Turkey, Chicken or Pork.  Follow your recipe to roast the Meat but be sure to add chopped Veg like Carrots, Onion, Garlic and Celery under the Meat as it roasts to add a lot of flavor to your Gravy.  After roasting Meat, remove the Meat and allowing the Meat to rest.  Remove all Veg leaving the fat and liquid in the pan.  Strain all the fat and juices into a large measuring cup or clear bowl.  Allow to sit for 3 minutes as the fat rises to the top then spoon as much fat off as you can reserving the juices.  In the pan that had the roasted Meat there will be cooked on bits stuck to the pan.   This is full of flavor.  Put your roasting pan over the burners of your stove (make sure it is flame proof) on high and add 1 c of Stock (Beef or Chicken depending on what your roasted Meat is.)  Use a wooden spoon and scrape up the cooked on Meat bits and dissolve them in the Stock.  This is deglazing.  And it also helps clean the pan.  Pour all the pan deglazing liquid into the same cup of the defatted Meat juices.


2.  In a large pan over medium heat melt the Butter.  When the Butter has melted whisk in the Flour until well incorporated and cook until bubbly for 2 minutes.  Add the Sea Salt and Pepper and whisk in well.


3.  Add in the reserved Drippings of roasting Juices mixed with the deglazing liquid and then add 1 cup of Stock and whisk bringing back to the boil for 2 minutes.   It will begin to thicken quickly.  Do not stop whisking so that it does not burn on the bottom of the pan.  Reduce the heat to low and simmer, whisking often, for 4-5 minutes.  Taste for seasonings and add Salt or Pepper as needed.  Just before serving add 1 t fresh Thyme.  You may add 1/2 c Milk at the end of the simmering stage for a creamy Gravy.
Serve Gravy immediately.

For the perfect Mashed Potato Recipe to go with this Amazing homemade Gravy click HERE.


COPYRIGHT (c) 2010

SAGE SAUSAGE STUFFING


SAUSAGE  SAGE  STUFFING


To some, Stuffing is the best part of Thanksgiving dinner.  The crispy Bread topping covers delicious moist seasoned Vegetables and spicy Sage Sausage.  This recipe is based on my Grandma's traditional recipe.  She always adds Sausage and Poultry Seasoning which makes this Stuffing so flavorful and is always the first thing I eat from my plate.   I think I may even like it more than the Roast Turkey but when I am Cooking The Amazing, I can have both.


Here is the recipe.


8 c  Sour Dough Bread or Brioche or Corn Bread, in 1 1/2 inch cubes
1 T  Olive Oil
1 lb.  Sage Sausage (Jimmy Dean or Bob Evans Brand)
6 T  Butter, no salt
1 1/2 c  Yellow Onion, diced
1 1/2 c  Celery, diced
1/4 c  Mushrooms, sliced
2  Garlic Cloves, minced fine
1 t  Sea Salt, fine grain
1 t  Black Pepper, fresh ground
1 t  Thyme, dried
1 t  Oregano, dried
2 t  Rubbed Sage
2 1/2 t  Poultry Seasoning
3 c  Chicken Stock
3 T Butter (To Butter The Baking Dish)


1.  Preheat the oven to 350 degrees.  Prepare a shallow 9 X 13 baking pan by placing it on a cookie sheet for easy transfer.  This recipe can be doubled, but you will need two 9 X 13 pans.

2.  Use a good quality Sour Dough or Brioche Bread or Corn Bread.  Cube 8 cups with a serrated knife into 1 1/2 inch cubes.  Place the cubes on a baking sheet and toast at 350 degrees for 10-15 minutes, turning once half way through, until lightly browned and toasted.  Remove from the oven and allow to cool to room temperature.  You can cook the Sage Sausage in the meantime.

3.  In a large pan over medium heat cook the Sage Sausage in 1 T Olive Oil, breaking it up into large chunks, until browned and cooked through.  Keep the Sausage in big pieces as much as possible.  Place the cooled Toasted Bread cubes in a large bowl and add the cooked Sausage to the same bowl.  Reserve 1 T Sausage fat in pan.


4.  In the same pan with the Sausage Fat, add 6 T Butter and saute 1 1/2 c diced Onion, 1 1/2 c diced Celery  and 1/4 c  sliced Mushrooms until soft, about 8 mins.  While sauteing, scrape up as much of the browned Sausage bits on the bottom of the pan and incorporate into the Vegetables.  This will add a lot of flavor.  


5.  Add the minced Garlic and Sea Salt, Pepper, Thyme, Oregano, Sage, and Poultry Seasoning and cook for 2 minutes.  The Vegetables should be very soft at this stage.

6.  Add the 3 c Chicken Stock to the pan of Vegetables and bring to a simmer.  Add all to the bowl of Bread and Sausage and fold in, keeping the Bread cubes intact as much as possible.  Taste for seasonings and add what you feel it needs to your own taste.

7. Butter the baking pan. Then pour all of the Stuffing mixture into the 9 X 13 baking pan and spread evenly.  Do not compress so the Stuffing stays fluffy when it bakes.  Bake at 350 degrees covered in foil for 45 mins  then uncover and bake for 5 more minutes or until the top gets browned.  Allow to sit for 5 mins before serving.


For traditional Roast Turkey recipe click HERE.


COPYRIGHT (c) 2010

ROASTED TURKEY

I can close my eyes and smell that wonderful aroma that comes out of the kitchen only on special holidays like Thanksgiving and Christmas when a Turkey is being roasted.   All the familiar cozy memories that are attached to that incredible smell flood your mind when you think of Roasted Turkey.  And sometimes those memories of dry tasteless slabs of Turkey are mixed in.   Roasting a Turkey does not require 8 hours in the oven and being suffocated by a plastic bag or waiting for that white and red timer pop-up thing to tell you when dinner is served.  If you follow a few simple steps you can serve a hot and juicy Turkey roasted to perfection during the holidays and even on a regular day when you are hungry for Roasted Turkey.  Always use a fresh natural Turkey if you have access to one.  Avoid those Salt and chemical injected Turkeys that I am sure would glow in the dark if given the chance.  If you can only find a frozen Turkey, be sure it is thawed completely by roasting day.   Plan ahead and brine the Turkey for at least 8 hours in a Salt and Sugar brine the night before for the juiciest Turkey.  When your family is sitting around the table with a succulent Roasted Turkey center stage they will all be thankful that you were Cooking The Amazing.


Here is the recipe.

1  Fresh Turkey
1 c  Sugar
1 c  Salt
1 Gallon Water
3  Celery Stalks, rough chopped
3  Carrots, rough chopped
1  Yellow Onion, cut into 8 pieces
3  Garlic Cloves, rough chopped
1/2 t  Sea Salt, fine grain
1/2 t  Black Pepper, fresh ground
2 T  Thyme, dried
2 T  Oregano, dried
1 t Paprika
1 1/2 t  Black Pepper, fresh ground
1 1/2 t  Sea Salt, fine grain
1 Lemon, quartered
1 Yellow Onion, large, quartered
3 Bay Leaves
1 T  Olive Oil
6 T Butter, no salt, softened


PREPARE AHEAD: Brine your fresh or thawed Turkey for at least 8 hours (or over night is best) in 1 c Sugar and 1 c Salt dissolved in 1 gallon of Water for the juiciest Turkey.  If you need more brine solution use the same ratio of 1 c each Salt and Sugar to 1 gallon Water.  Be sure to dissolve the Salt and Sugar before adding the Turkey.  You can do this the night before in a cooler with lots of ice on top or in the refrigerator in a large container (stock pot, new bucket, giant ziploc bags) if you have the room.  Remove your turkey and rinse well under cold Water and pat dry with paper towel.

1.  Preheat your oven to 350 degrees.

2.  Before touching the Turkey have all of your ingredients prepped and ready so you do not risk contaminating them with bacteria from raw Turkey.

3.  Use a sturdy jelly roll sheet pan with sides to assist with safe transfer of the Turkey in the roasting pan to and from the oven.  I use foil roasting pans from the market so I do not have to worry about yet another pan to wash after a big meal.  Place the foil roasting pan on the jelly roll sheet pan.

4.  Roughly chop the 3 Stalks of Celery, 3 Carrots, 1 large Yellow Onion and 3 Cloves of Garlic and place them on the bottom of the roasting pan.  Sprinkle the 1/2 t Sea Salt and 1/2 t Pepper over top.  This will season the juices that come from the Turkey as it cooks and can be used for a flavorful Gravy.  Set this near your kitchen sink so you can transfer the washed Turkey into it easily.

5.  Mix in a small bowl the Paprika, Thyme, Oregano, 1 1/2 t Sea Salt and 1 1/2 t Pepper together well and set aside.  

6.  Chop the other Onion and quarter it and the Lemon to be used to stuff the Turkey cavity for flavor later.  Have Bay Leaves ready.  Set all aside. 

7.  Have the softened Butter on a small plate ready to use.  1 T Olive Oil near the Butter.

8.  Have several paper towels torn from the roll and next to the sink to dry the Turkey after you wash it.

9.  Place your Turkey into a dry kitchen sink or in another large foil pan then place the pan and Turkey in a dry kitchen sink.  Run very cold water over the entire bird including the cavity and rinse it well.  Remove any neck or giblets before washing from the cavity.  Pat the entire surface of the washed bird dry with the paper towel and drain any water from the cavity.  Pick up the Turkey and place it in foil pan that you will roast it in breast side up.

10.  Wash your hands very well. 

11. Tuck the tip of the wing back behind the neck cavity and shoulder of the bird to keep the Turkey tight to roast more even.

12.  Using your fingers, separate the skin from the breast gently, being careful not to tear the skin.  This will create a space to rub with butter later.
13.  Spread 1/3 rd of the softened Butter with your hands as evenly as you can beneath the skin in the pocket you created and then pull the skin back in place.
13.  Rub the entire outside with 1 T Olive Oil with your fingers then spread the remaining softened Butter on the entire outside skin surface of the bird evenly.
14.  Sprinkle the Herbs and Sea Salt and Pepper mixture evenly over the entire bird.


15.  Stuff the cavity with the Lemon and Onion quarters and Bay Leaves and wash your hands very well.

16.  Roast the Turkey in the lower third of your oven at 350 degrees until the juices run clear and the internal temperature reaches 165 degrees in the thickest part of the breast and thigh.  Check your Turkey at the time frame below to see if it is cooked.
During the roasting process do not baste and do not open the oven door until you check the temperature.

Approximate times to roast your Turkey and when to check the temperature and check for clear running juices:

11-13 lb. bird roast for    2 hrs. 30 mins.
14-16 lb. bird roast for   2 hrs. 45 mins.
17-20 lb. bird roast for   3 hrs. 15 mins.
21-24 lb. bird roast for   3 hrs. 30 mins.

*This is a guide only and you should rely on the internal temperature and the visual inspection of clear juices running from the meat and no pinkness.

17.  When the Turkey is cooked to 165 degrees and juices run clear, remove form the oven and cover with a tent of aluminum foil and allow to rest 20 mins. so the juices will redistribute into the meat.  Carving too soon will result in dry Meat where the juices run out as it is carved.  Serve immediately after carved spooning some of the drippings from the pan over the carved meat.  If you plan to make Homemade Gravy reserve the rest of the drippings.  And don't forget the Sage Sausage Stuffing!


For a delicious Sage Sausage Stuffing recipe click HERE.

For a delicious Homemade Gravy Recipe click HERE.


COPYRIGHT (c) 2010

November 13, 2010

PESTO

                      
                    PESTO

Summer is really Pesto time because that is when the Basil can be picked fresh in your backyard with that unmistakable summer garden taste. But you can make Pesto all year long using fresh Basil from the market.  Pesto is one of those simple recipes that the food processor does most of the work but because of the few ingredients they must be of high quality.  Use Parmigiano-Reggiano cheese for the most amazing flavored Pesto.  It is expensive but you only need a cup finely grated and it will elevate the flavor intensely.   Simply stated, you get out what you put in, as in most recipes.  Pesto can also be frozen in an air tight container with a drizzle of Olive Oil on top to protect the flavor and that vibrant green color. Use your delicious Pesto in cold Salads with fresh Mozzarella and Tomato and over hot Pastas.  It can be a used as a sauce for Fish, Shrimp, grilled Chicken or Steaks.  Spread it on toasted rustic Bread and serve with a fresh Green Salad.  There are many way to serve and enjoy fresh Pesto all of which will have you Cooking The Amazing.


Here is the recipe.


3 c  Fresh Basil, loosely packed (about 3 oz.)
3 oz  Pine Nuts, toasted
1 c  Parmesan Cheese, grated fine
2-3  Garlic Cloves, finely chopped
1/3 c  Extra Virgin Olive Oil
3/4 t  Sea Salt, fine grain
3/4 t  Black Pepper, fresh ground course
1 T  Lemon Juice, fresh squeezed


1.  Toast the Pine Nuts in a dry pan (no oil or butter) over medium heat until they turn lightly browned and you start to smell them cooking.  Watch them close, they burn very fast!  Keep them moving in the pan so they do not burn. Toasting brings out incredible flavor.  Taste one before toasting and after to see the amazing taste difference.  This takes about 5 mins.

Pine Nuts are pale and a little dull before toasting them.


After toasting they develop a rich nutty flavor that really improves the Pesto.

2.  Place the toasted Pine Nuts in the food processor.  As you prepare your other ingredients place them in the food processor fitted with a steel blade. Grate the Parmesan Cheese finely.  Finely chop the Garlic.  If you like more Garlic flavor use 3 cloves.  The food processor often can not chop Garlic fine and leaves large chunks so prechopping helps prevent this.  Add the Olive Oil and then squeeze the juice from a fresh Lemon and add 1 T of the juice.  Add the Sea Salt and Pepper.  On top place the fresh Basil with stems removed.

3.  Pulse in the food processor several times to get it going.  Scrape down the sides of the bowl often and then process until all the ingredients are well processed.  About 45 secs.  Taste the Pesto and adjust seasonings or add more Garlic or Lemon Juice if you prefer then reprocess a few seconds to remix.  Do not over process.

4.  Use immediately or refrigerate or freeze right away.  To store place in an air tight container and drizzle a thin layer of Olive Oil over the top to protect flavor and color.  Never cook Pesto over heat.  Always add it to something else that is hot to warm it through like Pasta and fold it in mixing well.


TIPS:  Serve your fresh Pesto over hot Pasta with grilled Shrimp and shaved Parmesan Cheese over top or serve cold in a Mozzarella Tomato Salad.   Toast slices of bread in the oven then spread a layer of Pesto then add fresh diced Tomatoes and shaved Parmesan Cheese as an appetizer or for lunch with Green Salad

COPYRIGHT (c) 2010

November 5, 2010

GRILLED GARLIC SHRIMP


GRILLED  GARLIC  SHRIMP

I live in the Midwest where the fresh Fish of the day is usually the Walleye we just caught from the lake.  Luckily, for us Midwesterners, fresh Seafood is available flown in year round in our local markets that have a reputable Fish monger.  Grilling fresh Shrimp brings a smokey essence to it's delicate flesh which, when a Garlic infused Olive Oil is added, creates the most amazing Seafood experience possible in your own Midwestern back yard.  Use very large Shrimp that are 8-12 Shrimp per pound if you can find them in your area.  If you have access to larger Shrimp use those and count yourself fortunate.  Grilled Garlic Shrimp served with my Greek Salad and my Roasted Asparagus or Roasted Potatoes will make a delicious dinner or lunch.  Weather you live by the ocean and can access the fresh Fish of the day or live far from any fishing boat, grilling Garlic Shrimp will have you Cooking The Amazing!


Here is the recipe.

2  lbs  Fresh Shrimp,  extra large  size 8-12/lb.
20  Basil Leaves, fresh, chopped fine
8 Cloves Garlic, crushed and minced fine
3/4  c  Extra Virgin Olive Oil
1 T  White Wine Vinegar
1/2  t  Red Pepper Flakes, crushed
1 t  Sea Salt, fine grain
1 t  Black Pepper, fresh ground
1 Lemon, fresh
Sea Salt and Black Pepper to finish


1.  Preheat your gas or charcoal grill to high heat.

2.  Prepare the Shrimp by removing the heads and legs and scoring the backs with a sharp paring knife and removing the dark grey or black vein if present.  Your fish monger will also do this for you.  Leave the shells and tail intact for grilling.  It will protect the flesh from burning.  Rinse the Shrimp under very cold water and pat dry and place on a large cookie sheet, cut side up.

3.  Chop the fresh Basil into small pieces and set aside.  You will sprinkle this on last to garnish.

4.  Finely mince the Garlic and place in a medium bowl.  Mix in the Olive Oil, Vinegar, Red Pepper Flakes, Sea Salt and Black Pepper well.

5.  Brush this mixture on the the flesh of the Shrimp.

6.  Place the Shrimp, cut side down, on the hot grill and grill for 3 minutes and flip.  DO NOT walk away.  Once flipped, brush the Shrimp again with the Garlic and Oil mixture and continue grilling for 2-3 minutes.  The Shrimp are cooked when the flesh is white and opaque and the shells have turned reddish pink.  Flare ups of fire are good and will char the edges giving the Shrimp a great smokey flavor but watch for over cooking and burning to the point of no return.

7.  Place the cooked Shrimp on a large platter and quickly squeeze fresh Lemon juice over the Shrimp and sprinkle with Sea Salt and Pepper and the chopped Basil and serve immediately.

Serve with my Amazing Greek Salad (Click Here).
Roasted Asparagus  is easy and a perfect side dish.