April 7, 2011

BAKED HAM WITH MAPLE CHERRY GLAZE


Sunday dinner and your holiday table will never be the same with this amazing Baked Ham glistening in a sweet Maple Cherry Glaze.  The Glaze perfectly balances the smokey saltiness of the Apple Cider Baked Ham.  I also use a good quality bone-in Ham that is also skinless for the best flavor and ease of cooking.  For a unique flavor and to ensure moisture I bake the Ham first in Apple Cider and then glaze it with delicious a glaze of Maple Syrup and Cherry Preserves.  When you are Cooking The Amazing it doesn't have to be Easter Sunday or Christmas dinner to serve the most delicious Baked Ham.


 Here is the recipe.


HAM
1  10-12 lb.  Fully Cooked Ham, bone-in and skinless
2 c  Apple Cider (or Apple Juice)


MAPLE CHERRY GLAZE
1/2 c  Maple Syrup
2  12 oz  Jars Cherry Preserves (Smuckers)
4 T  Dijon Mustard
1 1/2 c  Dark Brown Sugar
1 t  Ground Cinnamon
1 t  Fresh Ground Black Pepper


1.  Preheat your oven to 375 degrees.  *NOTE that this Ham bakes for a total of  3-3 1/2 hrs. then rests for 20 mins. to help you to plan on when to serve it.


2.  Remove your Ham from the plastic and place it in a medium roasting pan.  Place the roasting pan on a cookie sheet for safe and ease of transfer to and from the oven later.  I use a disposable foil roasting pan that requires no clean up!  Place the Ham with the exposed meat side down and score the outer flesh with a knife in a criss cross pattern about 1/8th inch deep.  Don't cut too deep or the juices will escape leaving a dry Ham as it bakes.

3.  Pour 2 cups of Apple Cider (or Apple Juice) over the Ham.  Cover your ham in aluminum foil tightly.
4.  Bake in the oven at 375 degrees.  After the first 1 hour 20 minutes of baking, remove the Ham and baste it with the pan juices from the bottom of the pan.  Return to the oven covering again in foil. Repeat the basting 4 more times (basting every 20 minutes for the next 1 hour and 20 minutes of baking). Keep the Ham covered with the foil as it bakes between bastings.  After the last basting, return the Ham covered in foil to the oven for 20 more minutes. 
5.  During the last few minutes of baking, prepare the Glaze.  In a medium sauce pan, over medium heat, combine the Maple Syrup, two 12 oz. jars Cherry Preserves (I use Smucker's brand because it has whole Cherries in it), Dark Brown Sugar, Dijon Mustard, Cinnamon and Black Pepper.  Mix well and simmer for 5 minutes.
6.  The Sauce will become thick and glossy as it simmers.  Taste it and adjust to your liking.
7.  After the Ham has baked for a total of 3 hours covered, remove the ham from the oven and remove the foil.  Spoon off all the pan juices from the bottom of the roasting pan and discard.


8.  Then pour the Maple Cherry Glaze you made over the Ham.  Keep uncovered and return to the oven and bake for 30 minutes more, undisturbed, without basting at 375 degrees.  Watch the Ham close for burning of the Glaze.  It will get dark in some areas as the Glaze caramelizes.  This will be the best bits! Then remove from the oven and check the internal temperature which should register at least 140 degrees in the deepest part of the Ham (do not touch the bone) when done.  If it is not at 140 degrees yet, allow it to rest for the 20 minutes in step 9 and then recheck the temperature.  The temperature will continue to rise as it rests.  If it is still below 140 degrees, return to the oven for 15 minutes at 375 degrees.  Repeat as necessary until you've reached the right temperature.  Ham sizes and ovens will vary which may increase cooking time.
9. Once you are at 140 degrees, spoon any of the Glaze from the bottom of the pan over the Ham several times to coat it well.  Pour any extra into a serving bowl to serve with the Ham on the side.  Tent the Ham in foil and let it rest for 20 minutes on the counter to allow the juices to redistribute before slicing and serving.
   
COPYRIGHT (c) 2011

March 13, 2011

WHITE WEDDING CUPCAKES


I love white wedding Cake.  After all, it is the best part of the wedding.  You know, those long, drawn out ceremonies where everyone is stuffed in their frilly dresses and new stiff white shirts wishing the party would start and the sappy stuff would end.  The Wedding Cake at the end makes it all worth it.   This recipe is to satisfy those White Wedding Cake cravings at home.  White fluffy, moist Cake with creamy white Vanilla Butter Cream Icing doesn't have to wait for love birds to tie the knot to be eaten.  You can make it anytime, for any reason, even for your own love bird... or just for yourself to eat while you watch that old VHS video of your wedding.  You can make this into a layer cake with Raspberry Jam or Fresh Strawberries in between the layers for a delicious surprise.  Or, if you are like me, leave good enough alone and serve it pure, plain and all white.   When you are Cooking The Amazing, "it's a nice day for a white wedding...Cake."


Here is the recipe.


1 1/2  Sticks Butter, unsalted, softened
1 2/3 c  Sugar
1 c  Buttermilk
1 c  Sour Cream
2 t Vanilla Extract
2 t Almond Extract
6 Egg Whites, from large Eggs
1/4 t  Cream of Tarter
2 1/2 c  Cake Flour (You may substitute All Purpose Flour but will be slightly more dense)
2 t  Baking Powder
2 t  Baking Soda
1 t  Sea Salt, fine grain
Butter to grease pans


1. Preheat oven to 350 degrees. *Plan ahead: Use room temperature ingredients for the fluffiest Cake.


2. This can be made into a layer Cake.  Butter two 9 inch Cake pans then line with parchment paper rounds in the bottom. Butter the top of the parchment papers. Or for Cupcakes, place 22-24 Large Sized Cupcake liners in muffin tins.


3. In the bowl of a KitchenAid with a paddle attachment or large mixing bowl with a hand mixer, cream softened Butter and the Sugar for 4 minutes, scraping down the bowl frequently. It will be grainy.
4. To the creamed Butter and Sugar mixture add the Buttermilk, Sour Cream, Vanilla Extract and Almond Extract and mix well with a hand mixer or KitchenAid for about 3 minutes.   It will look curdled.
5. In a separate large bowl using a hand mixer, whip the Egg Whites and the Cream of Tarter into stiff peaks. About 3-4 minutes and set aside.
6. In a separate medium bowl (I know, another bowl to clean, but this Cake is worth it.) sift the Cake Flour, Baking Powder, Baking Soda, Sea Salt and then whisk well to combine. It is important to lighten the Flour by sifting and to make sure the Baking Soda and Powder are well distributed.
7. Pour the dry ingredients into the bowl of wet ingredients and mix for about 1 minute until no flour is seen. Be careful not to over mix.  Scrape down the bowl often.
8. Add 1/3 of the whipped Egg Whites to the mixture and mix in to lighten the batter using a rubber spatula. Then add the rest of the whipped Egg Whites and fold it in using a rubber spatula until incorporated well.

9. Pour cake batter mixture into the 2 prepared 9 inch cake pans divided equally and place into the center of the preheated oven and bake for 22-25 minutes or until a toothpick comes out clean from the center of the cake.  Check the the cake at 22 minutes.  If not done, place back into the oven and continue to bake checking again in 1 minute intervals until a toothpick comes out of the center of the cake clean.  The cake will be very pale lightly browned in color when done.  Rotate your pans half way through for even baking.


10. For Cupcakes, fill Cupcake liners 1/2 way up and bake for 19-22 minutes at 350 degrees until a toothpick comes out clean and tops are lightly browned. * Don't overfill liners or they will over flow.  Rotate the pans half way through.


11.  Allow to rest in the pan for 1 hour before removing to cool to room temperature. This is a very moist and fragile cake so handle with care.  Once cooled completely ice with Vanilla Butter Cream then dust with Powdered Sugar if desired.  To make it fun for kids add sprinkles.


VANILLA BUTTER CREAM


4 1/2 sticks Butter, unsalted, softened
5 c Powdered Sugar
1 T Milk
4 t Vanilla Extract
3-5 t Almond Extract
1 Pinch fine grain Sea Salt (very small pinch)

Total Prep Time: 5 minutes (except time to soften butter.)


1.  Allow Butter to sit out until it is room temperature until softened.

2.  In a large bowl, place the softened Butter.

3.  Cream the butter with a hand mixer for 1/2 minute.

4.  1 cup at a time, add the Powdered Sugar and blend well.

5.  In a small bowl, add Milk, Salt (very very small pinch), Vanilla and Almond Extracts and mix well. * Different brands of Almond Extract are stronger than others. Start off with 3 t mix well and taste and add 1 t at a time until you get what tastes best to you.

6.  Begin mixing the Butter and Powdered Sugar again and add the liquid Milk and Extract mixture until mixed in well, approx 2 mins.  Taste and add more Extracts as needed.

7.  Keep Butter Cream Icing at room temperature for the best consistency to ice cakes.

8.  Refrigerate unused icing. To use again, bring to room temperature then mix with a hand mixer for about 1 minute before using.

OTHER FLAVOR OPTIONS: Delete the Almond extract and add 3-6 tsp. of your favorite extracts like Peppermint or Coconut. Or add 1/2 c to 1 c of Raspberry Jam or Strawberry Jam for a delicious Icing.


TIP:  If you do not wish to use traditional Vanilla Butter Cream then choose the Icing of your choice to ice your Cake.   Butter Cream Icings are always a good choice, it's picking the flavor that's hard. 


Click HERE for amazing Butter Cream Icing recipes like Chocolate Butter Cream or Coconut Butter Cream.
For a delicious Cream Cheese Icing click HERE.
Or for a twist on tradition try dipping Cupcakes into dark rich Ganache or icing with Coconut Pecan Icing.


COPYRIGHT (c) 2011

March 11, 2011

ITALIAN POT ROAST


This is not your everyday Pot Roast.   It is made with an amazing Sauce of Italian Wine and Spices blended with the mellow flavor of braised Garlic, Onions and Fennel.  This Pot Roast is a simple braise using a Beef Roast to build the rich flavors from the beginning that is then long roasted in the rich Sauce.   Serve this on a cold Sunday evening with crusty Italian Bread and a simple Green Salad with a sharp Vinegary Dressing to cut the richness of the Pot Roast for an amazing dinner and you will be Cooking The Amazing. 


Here is the recipe.


4 lb  Beef Roast (Butt or Chuck is best) 
2  Large Yellow Onions, chopped
2  Stalks Celery, diced
2  Medium Carrots, peeled and chopped
1  Fennel Bulb, chopped
6 Cloves of Garlic, chopped
2 T  Olive Oil
1 t  Sea Salt, fine grain
1 t  Fresh Ground Black Pepper
3 T  Olive Oil
1 t  Sea Salt, fine grain
1 t  Fresh Ground Black Pepper
3 T  Tomato Paste
1 T  Worcestershire Sauce
1 c  Italian Red Wine (like Chianti)
5 c  Tomato Sauce (good quality)
1 T  Red Wine Vinegar
2 T  Beef Base
2-3  Bay Leaves
1 1/2 t  Dried Thyme
2 t  Dried Oregano
1/4 t  Crushed Red Pepper Flakes
2 T  Fresh Italian Parsley, chopped for garnish


1.  Prep all of your Vegetables by rough chopping them.  Peel the Carrots first before chopping.  Place the Onions, Celery, Carrots , Fennel and Garlic in a food processor and process until finely chopped.
Set the Veg aside.
TIP:  To prep the Fennel, cut the green parts off the top of Fennel and split the bulb in half, removing the hard core found in the bottom center.


2.  Preheat your oven to 325 degrees.  This roasts for 2 1/2 hours total and rests for 15 minutes before serving. 

3.  Use paper towels to pat dry your Beef Roast.  Trim any excessive fat off but leave some fat for flavor.  Marbled fat Meat is good!  Pick a Roast with fat in it.  A lean Roast will be dry and not taste as good once cooked.  Add 2 T of Olive Oil to a large heavy pot or Dutch oven (like Le Creuset) over medium high heat.  Once hot, add the Beef Roast and sprinkle with 1 t Sea Salt and 1 t fresh ground Black Pepper after placing in the pot.  Brown well on all sides, about 2-3 mins per side.  You are not cooking the roast all the way through, but browning the outside giving it best flavor when it is done.  When all sides are browned, remove from the pot and set aside on a platter while you cook the Veg.


4.  Pour out any Olive Oil left in the pot, leaving any cooked on brown bits on the bottom of the pan.  Turn the heat down to medium and add 3 T of fresh Olive Oil.  Once hot, add all the processed Veg and 1 t Sea Salt and 1 t fresh ground Black Pepper, stir well and frequently, watching for burning.  Saute for 8-10 minutes until all the Veg are browned.  You want it to be very well cooked.  It will start out very orange then look a dull brownish color as it cooks.

5.  Once the Veg are cooked, add 3 T of Tomato Paste and stir in well and cook for 2 minutes.


6.  Next, add 1 T of Worcestershire Sauce, 1 c Red Wine, 5 cups of  good quality Tomato Sauce, 1 T Red Wine Vinegar and 2 T Beef Base and increase the heat to medium high and bring to a boil.  Stir constantly, scraping up any bits from the bottom of the pot.  Allow to boil for 1 minute then add Bay Leaves, Thyme, Oregano and Crushed Red Pepper Flakes.  Be careful, it will splatter!  Taste the Sauce and add Sea Salt or Black Pepper as needed.

TIP:  Beef Base is a paste that comes in a jar found near the Bouillon Cubes.  There are powdered Beef Bases and paste Beef Bases.  Never get the powdered.  Penzey's Spices has a great one or use Better Than Bouillon Organic Beef Base which is found at Whole Foods Market and most other markets.


7.  While the Sauce is still boiling add the Beef Roast back to the pot and any juices that collected while it rested from the platter.  Baste the Roast with the Sauce a covering it with the thick Sauce and place the lid on.  Place the pot on a cookie sheet and place in the center of your oven and roast for 1 hr 30 minutes at 325 degrees.


8.  After 1 1/2 hours in the oven, check the Sauce.  It should be liquidy and moist but reduced and thickened.   The top of the Beef Roast will look dryer than the surrounding Sauce.  Turn the Roast upside down and baste the top with the Sauce.  Put the lid back on and return to the oven to continue cooking 30 more minutes still at 325 degrees.


9.  After 2 hours of roasting remove the lid.   Taste the Sauce and add Sea Salt or Black Pepper as needed.  This time return to the oven (still at 325 degrees) without the lid and roast for the last 30 minutes so the Sauce can concentrate.


10.  After 2 1/2 hours remove from the oven and allow to sit in the pot for 15 minutes undisturbed with the lid off.  Remove the Bay Leaves so no one chokes on them.  Remove any fat that has settled to the top by spooning it off.   Serve by carving large pieces from the Roast placed on top of Cooked Pasta, Mashed Potatoes or Polenta with the Sauce spooned over.  Garnish with fresh chopped Italian Parsley.


COPYRIGHT (c) 2011

March 1, 2011

FRENCH TOAST

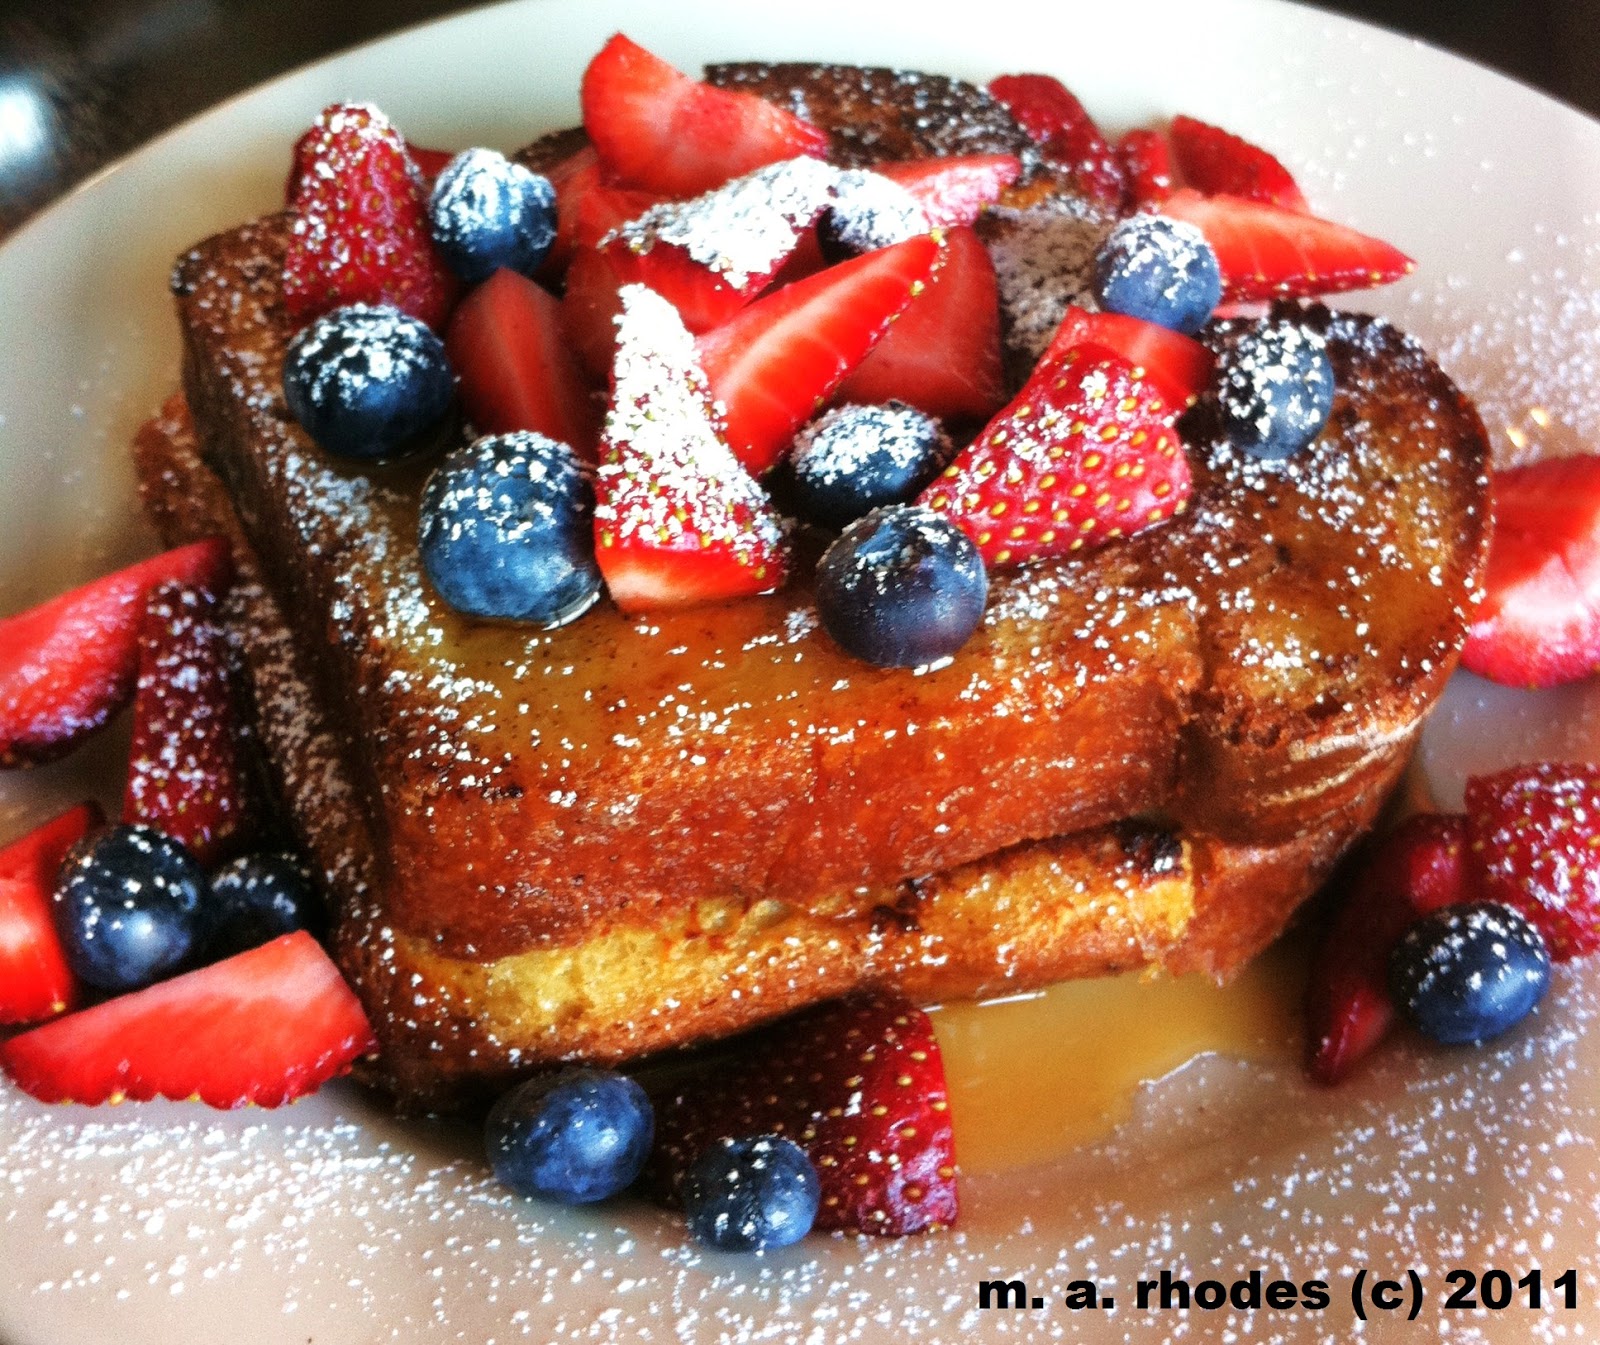
It's usually only on Sunday mornings, special Sunday's at that, that we eat French Toast at my house.  But, lately with all this Brioche Bread making going on, it's been a Sunday French Toast breakfast even on a regular Wednesday.  The above picture is from yesterday's breakfast of amazing Brioche French Toast with a hint of Cinnamon and sweet Brown Sugar with thick Maple Syrup and fresh Berries.  You can use any great tasting Bread for French Toast but Brioche really makes the best.  For a special breakfast, like a birthday or Mum's Day, you could even make French Toast even more amazing by topping it with Banana Pineapple Foster Sauce.   This would be for someone very special indeed!   No matter how you choose to top it, Toasted Pecans and Maple Syrup, Bacon and Maple Syrup or just a dash of Powdered Sugar, French Toast is an all time favorite when you are Cooking The Amazing.


Here is the Recipe.


6  Thick Slices of Bread (preferably Brioche)
3 T  Butter
1 c  Half and Half
2  Large Eggs
1/4 c  Dark Brown Sugar
1/2 t  Ground Cinnamon
1 t  Vanilla Extract
Pinch of Sea Salt, fine grain
Optional Toppings


1.  If you have a whole loaf of Bread , slice your Bread into thick 1 inch slices.  The best Bread for French Toast is Brioche.  You can make it using my recipe HERE or buy a good quality one.  Any good Bread will work well for French Toast.  Challah, French Bread or Sour Dough also make amazing French Toast.
2.  In a shallow dish whisk the Half and Half, Eggs, Brown Sugar, Cinnamon, Vanilla and Sea Salt well.  Heat a medium pan over medium heat and Melt 3 T of Butter in it.


3.  Place your Bread into the Half and Half mixture and allow to soak for 30 secs. then flip to the other side and soak for 30 secs. as your pan heats up.
4.  Place into the pan of melted Butter and cook on both sides for 2-4 minutes on each side until well browned.
5.  Once browned remove to platter or plate and top with your favorite toppings and serve immediately.
6.  Some amazing toppings to try:  Mixed Berries, Hot Maple Syrup over Fried Bacon,  Whipped Cream and fresh Bananas, Blueberry or Strawberry Jam,  Applesauce and Cinnamon or Mascarpone Cheese and Fresh Cherries.  

Banana Pineapple Foster Sauce on top of this French Toast would be the ultimate!


COPYRIGHT (c) 2011

February 25, 2011

BRIOCHE


Brioche can be easy to make.  The best French Toast, Bread Pudding, Cinnamon Rolls, Croutons and Fresh Bread Crumbs can all be made from a loaf of Brioche.
Brioche is that Buttery, rich Eggy Bread served in great bakeries in France and America that brings some people to tears when they eat it.  I may even have a tear in my eye as I write this.  When you think of Brioche or Bread making in general, you assume it will be difficult and impossible to do.  Brioche can easily be made with a KitchenAid stand mixer which does all the work, giving your hands a rest and resulting in the most delicious Bread.  Of course, you can hand knead it if you like...but why?
When you are Cooking The Amazing it's all about the end result being the most delicious even if it's easy.


Here is the recipe.


1 T  Butter (To Butter the Bowl)
2 1/4 t  Dry Active Yeast (1 envelope)
1/3 c  Warm Water
6 c  Bread Flour
1/3 c  Sugar
2 1/2 t   Sea Salt, fine grain
6  Large Eggs
3  Large Egg Yolks
4  Sticks Butter (cold, no salt)
1/4 c  All Purpose Flour (to Flour the board)
1 Large Egg (for Egg wash)
1 T  Water (for Egg wash)


1.  Butter a large bowl to place the Dough in later with 1 T room temperature Butter and set aside.  In a small cup or bowl pour 1/3 c very warm water from the tap (about 110 degrees) and add the Yeast and stir.  Set aside to proof for 5-7 mins.  The Yeast will begin to bubble and increase in size.  This means it is alive and well.  If nothing happens the Yeast is not alive and won't make the Brioche rise.

2.  In the bowl of a KitchenAid mixer fitted with the dough hook, put the Flour, Sugar and Sea Salt.  Mix well for a couple minutes while the Yeast proofs.

3.  In a separate bowl, crack 6 large Eggs and add 3 Yolks from large Eggs and whisk well.  Set aside.


4.  Remove the cold Butter from the fridge and cut each stick into small cubes, about 1/2 inch square or so.  Set aside.

5.  Once the Yeast has proofed, turn the mixer on low and add the Yeast to the Flour mixture all at once then add the Egg mixture all at once.  Continue to mix on low.  The Dough will look dry and crumbly at first.

6.  Increase the speed of the mixer to medium speed and add 1/4th of the cold Butter.  Allow to mix for 15 secs. then add 1/4th more of the Butter.  Repeat every 15 secs. until all the Butter has been added.

7.  Continue to mix at this speed for 10 minutes allowing the cold Butter to incorporate.  The Dough will go from looking dry to looking sticky and finally to form a smooth large ball.  Scrape down the bowl often.  You may also need to wrangle the Dough from creeping up the Dough hook from time to time.

8.  After 10 mins. the Dough ball should be smooth.  Pull it from the Dough hook and place in the large Buttered bowl that you prepared earlier.  Cover very tightly with plastic wrap and refrigerate over night. 16 hrs. minimum but 24 hrs. is even better. 


9.  The next day remove the Dough from the fridge and take the plastic wrap off.   The top of the Dough will look dried out and the the Dough will have increased in size, but not a lot.   Spray 2 loaf pans with non-stick Vegetable spray (like Pam).  Sprinkle about 1/4 c All Purpose Flour on a board and dump out the Dough on the Flour.  Cut the Dough in half and form into a rough loaf shape.   The Dough will feel heavy and dense.  Knead it for 1 minute to soften the Dough to make it workable.  If you are not making loaves, form the Dough into the shapes you want at this stage (as in roll out the Dough for Cinnamon Rolls or for small individual Brioche rolls).


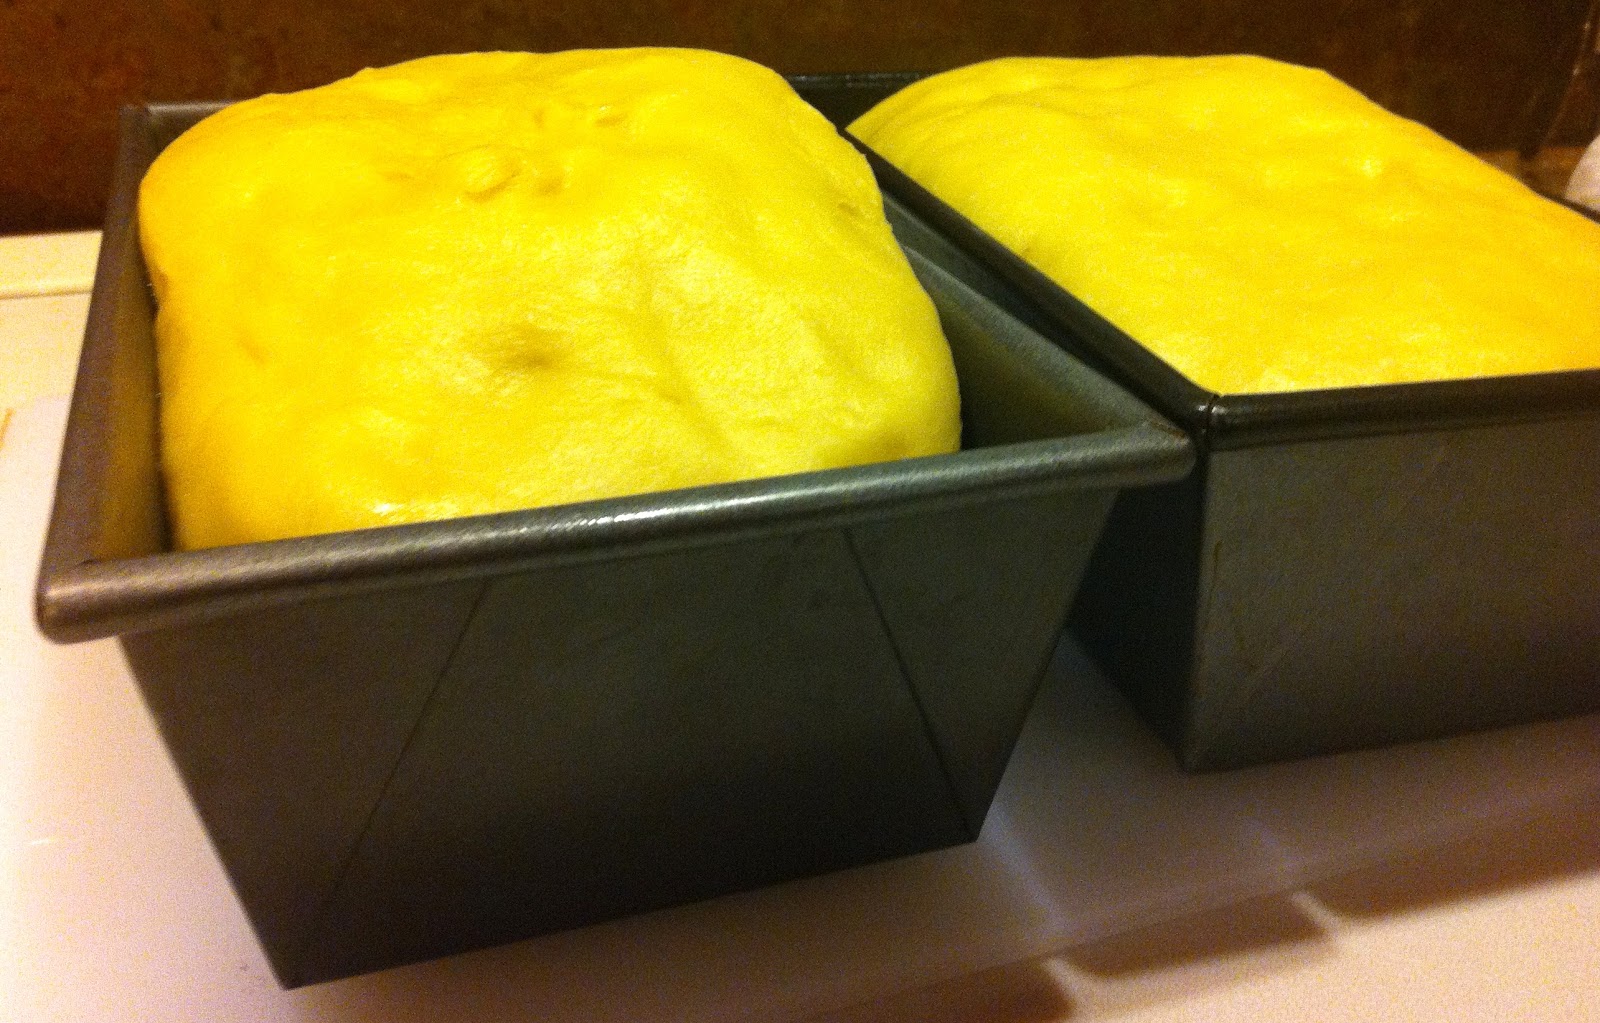
10.  Place the shaped Dough into the prepared pans then cover with a kitchen cloth and place in a warm place and allow to rise, doubling in size, approx. 2-2 1/2 hours.  A trick I use is to turn my oven on to 200 degrees for a couple minutes then turn it off.  I open the door and let some of the heat out and check that it isn't too hot.  I put my loaf pans with my Dough in the oven with the door closed to rise for the 2-2 1/2 hrs.  This makes a nice warm protected spot.

11.  After the Dough has doubled in size, preheat the oven to 350 degrees.  (If you used your oven as a warm spot to rise, remove the risen Dough and set on the counter as the oven heats up.)  Score the top of the Dough gently with a sharp knife down the middle lengthwise.  Make the Egg wash: Mix one large Egg with 1 T Water in a small bowl and brush this mixture on the tops of the Dough.  This will give the Bread a beautiful shiny brown top crust.


12.  Bake at 350 degrees in the center of your oven for 50-55 minutes for loaves until the top is well browned.  Small Rolls bake for 25-30 minutes.
Tap the Bread on top listening for a hollow thump indicating it is done.  Immediately remove from the loaf pans and allow to cool on a wire rack.


Click here for an amazing Cinnamon Rolls Recipe  made from this Brioche Dough recipe or for the most delicious French Toast you will ever eat!


COPYRIGHT (c) 2011