March 16, 2010

OATMEAL COOKIES


 It is both chewy and crispy at the same time with a hint of Cinnamon and Vanilla and sweetened with Dark Brown Sugar.  The Oatmeal Cookie is another classic American Cookie which can be spiced up with plump Raisins or made super indulgent with rich Chocolate Chips.   Eat one or two and when no one is looking eat another because you are Cooking The amazing.


Here is the recipe.


2  Sticks Butter, softened, unsalted
1 1/4  c  Dark Brown Sugar, packed
1  c  Sugar
1  t  Salt (fine Sea Salt preferably)
2 1/2  t  Vanilla Extract
2  Eggs, large (room temp.)
2  c  All Purpose Flour
2  t  Baking Soda
2 1/2  t  Cinnamon
3  c  Oats, old fashioned (not quick/instant oats)
OPTIONAL:  1  c  Raisins or Semi-Sweet Chocolate Chips or toasted Pecans, chopped or Butterscotch Chips.

*This makes about 3 dozen cookies.
Approx. Cooking and Prep Time:  1 hour plus cooling


1.  Preheat your oven to 350 degrees.  Spray 2 cookie sheets with non-stick Cooking Spray.

2.  If you are using Raisins:  Measure 1 c of Raisins into a small bowl and pour about 3/4 cup of Orange Juice over them and stir.  Allow to soak and plump up while preparing the batter.  Drain well before adding to batter.

3.  In a large bowl cream Butter, Dark Brown Sugar, Sugar, Salt, and Vanilla together until well mixed.

4.  Add the Eggs one at a time and mix well.

5.  In a separate bowl, whisk Flour, Baking Soda, and Cinnamon until well combined.

6.  Slowly add the Flour mixture to the creamed Butter mix and mix well without over mixing.

7.  Add the Oats one cup at a time and mix until just incorporated.  The batter will be dense and thick.

8.  If adding Nuts or Chocolate Chips fold them in last.  If adding Raisins, drain them from the Orange Juice well then fold them in.
                            
9.  Form 2 inch round flattened disks about 1/2 inch thick with your hands and place them 3 inches apart on the prepared cookie sheets.  Bake 9-13 minutes in the center of your oven at 350 degrees until the edges are lightly browned and centers are still pale.  Half way through baking rotate your cookie sheet for even baking and bake just one sheet at a time for best results.  Use a dark cookie sheet if possible. 

10.  Remove from the oven and allow to rest on the cookie sheet for 5 minutes before removing with a spatula to cooling rack.

11.  Respray the cooled cookie sheet between batches with non stick Cooking Spray.  These will stick if the pan is not well oiled.

12.  Allow to cool completely and store in an air tight container.


COOKIE BAKING SUCCESS TIPS:


1. Use high quality ingredients. Better made flours (like King Arthur Brand, Gold Medal), Better Vanilla Extracts (Like Nielsen Massey), Better Chocolate (Like Ghirardeli, Dove, Scharffen Berger). Fake Vanilla makes a fake tasting cookie. Use a box mix if you want the fake flavor taste. Bad Chocolate tastes like bad Chocolate. Period. A good brand of Flour ensures a uniform flour that is consistent every time. Generic Flour companies in the US often use the lowest quality wheat from different sources.


2. Use fine Sea Salt. Morton Table salt with iodine is the last thing you want to use in baking. It has a very chemical after taste and just a small amount is noticeable. I use Hain Brand Sea Salt without iodine.  Don't buy expensive Sea Salts for baking.  Just get a good real Sea Salt. Do not use large grain Kosher salts. They do not dissolve as well leaving salt pockets.


3. Use the Freshest Eggs and Butter. Old Butter and Eggs makes cookies that taste rancid.  Room temperature Eggs and Butter for cookies is best.

4. Sugar, brown and white, should be fresh. Use the freshest, softest Brown Sugar. It makes a huge difference. Brands of sugar are not as important. Sugar manufacturing in the US is fairly consistent brand to brand so a generic brand is just fine.

5. After you have added the Flour to a recipe, do not over mix but still be sure to mix the ingredients well to form a uniform batter. Over mixing makes a tough textured cookie because over mixed flour produces gluten leading to a bread like texture. As soon as the Flour is no longer seen, it is well mixed.


6. Form uniform sized dough balls/disc so the Cookies bake all the same. This eliminates some being over cooked and some being raw in the center.


7. Use a dark colored cookie sheet. Place the cookie sheet in the center of your oven on the center rack and rotate the cookie sheet around 1/2 way through baking. This keeps the cookies evenly baked if you have a hotter spot in your oven. Bake one sheet at a time. Keep the oven door closed as much as possible so the temperature stays consistent.


8. Allow the Cookies to rest for 3 mins. on the cookies sheet once removed from the oven. The Cookies are still cooking and need to set up before removing.

9. Place on a baking rack to cool completely before storing in an air tight container. Minimum 2 hours cooling time.


10. Make sure the cookie sheet cools completely before adding another batch of dough.
                 

COPYRIGHT (c) 2010

March 12, 2010

CHOCOLATE CHIP COOKIES


CHOCOLATE  CHIP  COOKIES

You will need a tall cold glass of milk when you eat these buttery, rich Chocolate Chip Cookies.   These Cookies are chewy and soft on the inside and lightly crisp on the outside.  Use the best Chocolate Chips you can find for the best taste. They will beg to be dunked in milk and are so good you will hide them from your kids because you are Cooking The Amazing.


Here is the recipe.


3   Sticks of Butter, softened, unsalted
1 1/2 c   Sugar
1 1/2 c   Dark Brown Sugar, packed
1 t   Salt, (preferably fine sea salt)
2  Eggs, large  (room temp.)
3 1/2 t  Vanilla Extract
4 c  All Purpose Flour
1 t  Baking Soda
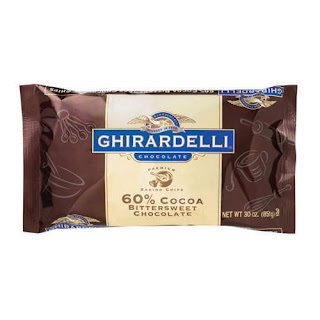
18 oz  Chocolate Chips (1 1/2 bags of the 12 oz size)
Optional:  1 c  Walnuts, Pecans, or Macadamias chopped and toasted

Total Prep and Cook Time:  approx.  1 hr to make several batches plus cooling time.

*Makes about 3 1/2-4 dozen cookies.


1.  Preheat oven to 350 degrees.

2.  Spray a cookie sheet with Non Stick Vegetable Spray (Like Pam) very lightly.  Use an dark pan if possible.

3.  This is a thick, dry dough that works best with a Kitchen Aid stand mixer to mix the dough well.  You can use a hand held mixer if it can handle thick dough.  Or mix by hand with a very sturdy spoon or use your hands like a bread dough.

4.  Cream the Butter, Sugar, Dark Brown Sugar and Salt well.  The Dark Brown Sugar is an important flavor component.  You can substitute Light Brown Sugar but it will not taste as good.   Make sure the Brown Sugar is fresh and very soft.  Old hard Brown Sugar will affect the texture of your cookie.

5.  Add the Eggs one by one to the mixture then the Vanilla Extract and mix well.

6.  In a separate medium bowl mix the Flour with the Baking Soda well to ensure even rising.

7.  Slowly add the Flour and Baking Soda mixture by the cup to the batter mixture.  Mix until the flour is just incorporated then add the Chocolate Chips and mix until just distributed.   Do not over mix.  *Add 1 cup of toasted Nuts and/or  1 cup of Options below now with the Chocolate Chips, if using.  Expect the dough to look dry and crumbly at times, this is normal.  

TIP:  Dry toast the chopped nuts on medium heat in a pan on the stove top for the best flavor.  Simply add the chopped nuts to a dry pan on medium heat turning them  frequently until they begin to brown.  They will burn easy so watch closely.  This makes a huge difference in the flavor of the cookie.  Allow to cool some before adding to batter, about 2 mins.

TIP:  Optional additions to add are Dried Cherries,  Dried Cranberries, other Chip flavors like Butterscotch, Peanut Butter, White Chocolate, or Caramel Chunks or  your favorite Nuts.


8.  Form small balls of dough with your hands and flatten into 2 inch across and about 1/2 inch thick round discs on the cookie sheet.  Space about 3 inches apart. 


9.  Bake on the center rack of your oven for 9-11 minutes at 350 degrees until the edges are a very light brown all around the cookie.  Half way through cooking rotate your pan around for even baking.  Cook only one sheet of cookies at a time.  The centers may not look fully cooked when you remove them from the oven, this is what you want for a soft chewy Cookie.   It will look uncooked but once it cools and sets it will firm up.  Let them rest for 4 minutes on the cookie sheet (they are still cooking while on the hot pan) then remove with a spatula to a cooling rack.  They need to set up before removing.  The cookies taste best after cooling for about 2 hours.  Store in an air tight container once completely cooled.

TIP:  For a crispier cookie bake for about 12-14 minutes until the center is lightly browned.


COOKIE BAKING SUCCESS TIPS:

1.  Use high quality ingredients.  Better made flours (like King Arthur Brand, Gold Medal), Better Vanilla Extracts (Like Nielsen Massey), Better Chocolate (Like Ghirardeli, Dove, Scharffen Berger).  Fake Vanilla makes a fake tasting cookie.  Use a box mix if you want the fake flavor taste.  Bad Chocolate tastes like bad Chocolate.  Period.  A good brand of Flour ensures a uniform flour that is consistent every time.  Generic Flour companies in the US often use the lowest quality wheat from different sources.  It does make a difference. 


2.  Use fine Sea Salt.  Morton Table salt with iodine is the last thing you want to use in baking.  It has a very chemical after taste and just a small amount is noticeable.  I use Hain Brand Sea Salt which is $1.50.  Don't buy expensive Sea Salt for baking (like fleur de sel) unless it is used as a finishing salt.  Just get a good real Sea Salt.  Do not use large grain Kosher salts.  They do not dissolve as well leaving salt pockets.


3.  Use the Freshest Eggs and Butter.  Old Butter and Eggs make cookies taste rancid.  Room temperature Eggs and Butter works best.


4.  Sugar, brown and white, should be fresh.  Use the freshest, softest Brown Sugar.  It makes a huge difference.  Brands of sugar are not as important.  Sugar manufacturing in the US is fairly consistent brand to brand so a generic brand is just fine.


6.  Form uniform sized dough balls/disc so the Cookies bake all the same.  This eliminates some being over cooked and some being raw in the center.


7. Use a dark colored cookie sheet.  Place the cookie sheet in the center of your oven on the center rack and rotate the cookie sheet around 1/2 way through baking.  This keeps the cookies evenly baked if you have a hotter spot in your oven.  Bake one sheet at a time.  Keep the oven door closed as much as possible so the temperature stays consistent.


8.  Allow the Cookies to rest for 4 mins. on the cookies sheet once removed from the oven.  The Cookies are still cooking and need to set up before removing.


9.  Place on a baking rack to cool completely before storing in an air tight container.  Minimum 2 hours cooling time.


10.  Make sure the cookie sheet cools completely before adding another batch of dough.


COPYRIGHT (c) 2010

March 11, 2010

BUTTER ROASTED CHICKEN


Who doesn't love a juicy, tender Roasted Chicken for dinner?  Roasting it at a high heat with Butter and savory Herbs like Oregano and Thyme brings full flavor to an American Classic.  The Butter and brining ensures the meat is juicy and crisps the skin for the perfect Roasted Chicken.   Brining will flavor and tenderize the meat leaving it juicy and succulent.  Serve with Roasted Asparagus or Seasoned Steamed Rice or the true American Classic side dish, Mashed Potatoes and Gravy and that is Cooking The Amazing.


Here is the recipe:


3-3 1/2 lb.  Fresh Chicken
1/2 c  Sea Salt for brining
1/2 c  Sugar for brining
8-12 c Water for brining
1 1/2 t  Sea Salt, fine grain
1 t  Pepper, fresh ground black
2 t  Thyme, dried
2 t   Oregano, dried
1/2 t  Garlic Powder
5 T  Butter, softened
1  Lemon
1 t  Thyme, dried or fresh
1  Onion, medium yellow
3  Garlic Cloves


1.  Wash the Fresh Chicken with cold water inside and out then drain all the water from the inside.  Pour approximately 8 c of fresh water in a large bowl or container or super large plastic ziplock bag and add the 1/2 c Sea Salt and 1/2 c Sugar and mix to dissolve.  Add the whole Chicken and be sure it is fully covered in the brine.  Cover tightly with plastic wrap and refrigerate for 3-4 hours.  This is brining.  After 3-4 hours remove from the brine and rinse with cold water and then pat dry with paper towels.  The Chicken is now ready to roast.  Wash your hand very well.  Clean any area the raw Chicken touched well.

2. Preheat your oven to 450 degrees. (yes, 450.) Get all of your ingredients measured and ready so you won't contaminate your kitchen with bacteria after handling the raw Chicken. Cut the Lemon and Onion into quarters. Chop the Garlic cloves in half. Mix all the dried Herbs, Garlic Powder, Sea Salt and Pepper together in a small bowl. Have the Butter softened at room temperature and mix it with the Herbs mix.

 3.  Pull the skin from the breasts up using your fingers to separate the skin from the flesh.   Then smear the 1/2 softened Butter Herb mixer under the skin as evenly as possible then pull the skin back in place.   Spread the rest of the Butter Herb mixture all over the outside skin evenly.


4.  Stuff the inside of the Chicken with the Lemon and Onion quarters and Garlic halves.  Sprinkle the Sea Salt and Pepper over the entire Chicken evenly.  Truss the legs together with kitchen twine by tying at the tips pulling the legs close together.  Tuck the wings tips back behind the chicken shoulders.  This tightens up the bird so it roasts evenly. 


5.  Place the Chicken into a roasting pan in the center of the oven at 450 degrees and roast for 60 mins. undisturbed and uncovered.  Do not baste or open the oven door.  It will be smokey at this high heat, especially if your oven is not clean, so be prepared for the fire alarm to go off.  Just remember: Stop, Drop and Roll!

6.  Remove the Chicken from the oven and test it's temperature at the deepest part of the breast and it should read at least 165 degrees when fully cooked.  The juices should run clear.  Baste the skin with the pan juices right after removing from the oven using a large spoon.

7.  Remove the Chicken to a cutting board and place a large piece of aluminum foil over the Roasted Chicken loosely and allow to rest 10 minutes.  It is important not to carve until it has fully rested or the juices can not redistribute and the meat will be dry.  The internal temperature will increase as the Chicken rests. 

8.  After resting, carve the chicken and place it on a platter and spoon any pan juices from the roasting pan over the meat on the platter and season with Salt and Pepper as needed and serve immediately.

TIP: Carving is easy if you first remove the wings, then the breasts by cutting a horizontal cut below the breast then a vertical cut on top of the breast removing it as one whole piece that you cut into cross slices.  This gives larger juicier pieces to serve as opposed to slicing thinly from the bird.  See picture below.  Then remove the legs at the joint and then the thighs.


COPYRIGHT (c) 2010

March 10, 2010

ROASTED ASPARAGUS AND BROCCOLI


ROASTED  VEGETABLES

Roasted Vegetables are a simple way to get your daily Veggie intake because when you roast Asparagus, Broccoli, or your favorite Veg like Green Beans at a high heat, they become delicious tender side dishes that everyone will want seconds of.  The aroma of nutty Roasted Vegetables and the true flavor roasting brings out will make those pale, limp, and soggy boiled veggies a thing of the past.  You can roast almost any vegetable because it is so easy and takes just a few minutes to prepare.  Consider roasting Red Bell Peppers, Red Onions,  or Whole Mushrooms using the following recipe and you will be Cooking The Amazing.


Here is the recipe.


2 lbs.  Fresh washed Asparagus, Broccoli,
             or Green Beans (Or your favorite
             Veggie)
3-4 T   Olive Oil
1 1/2 tsp   Salt (preferably fine Sea Salt)
1 1/2 tsp   Fresh Ground Black Pepper
Optional:  Garlic, Red Pepper Flakes, Lemon, Parmesan Cheese, Balsamic Vinegar (see below)


1.  Preheat your oven to 400 degrees.

2.  Cover a cookie sheet with aluminum foil which will help with clean up later.

3.  Wash and blot dry your Vegetable of choice with a kitchen towel.

4.  For Asparagus, trim off any woody ends and if the stalk is very thick use a vegetable peeler and shave off the thick outer flesh of the lower one third of the stalk to expose the most tender part.

5.  For Green Beans, cut off both ends and remove the string if present.  Leave them whole.

6.  For Broccoli, cut off florets into whole pieces.

7.  Using your hands, toss the prepared Vegetables with the Olive Oil, Salt and Pepper and arrange in a single layer on the cookie sheet.

8.  Roast at 400 degrees in the center rack of your oven for 15-20 minutes (Broccoli may take 25-30 mins) turning over with a spatula half way through roasting for even cooking.

9.  The Vegetables will become brown on the edges which is a good sign that it is caramelizing well.

10.  If you prefer softer Vegetables with more caramelized flavor, cook longer watching it close.

11.  Options:   In step 7, before tossing with the Olive Oil: slice thin 3-4 cloves of fresh Garlic and place in a small pan with 4 T of Olive Oil over medium heat.  Cook until the garlic just begins to brown and remove from the heat.  Toss the Garlic and Oil with your Vegetables and proceed as above adding Salt and Pepper then roast as directed.

Another option is to add 1/2-1 t of Dried Red Pepper Flakes when you are tossing with the Olive Oil and Salt and Pepper for a spicy kick.

12.  Remove from the oven when the Vegetables are tender and browned testing at 15 minutes and roasting longer if needed.  Serve Immediately.

13.  Options:  Squeeze fresh Lemon Juice and/or add grated Lemon Peel immediately when you remove from oven and serve.

Or sprinkle with several drops of Balsamic Vinegar and toss then serve.

Or grate Fresh Parmesan Cheese over the top and serve immediately.

14.  Be creative and mix your favorite Vegetables and roast together like Green Beans and Red Onions or Mushrooms and Asparagus with Garlic.


                                  COPYRIGHT (c) 2010