February 25, 2011

BRIOCHE


Brioche can be easy to make.  The best French Toast, Bread Pudding, Cinnamon Rolls, Croutons and Fresh Bread Crumbs can all be made from a loaf of Brioche.
Brioche is that Buttery, rich Eggy Bread served in great bakeries in France and America that brings some people to tears when they eat it.  I may even have a tear in my eye as I write this.  When you think of Brioche or Bread making in general, you assume it will be difficult and impossible to do.  Brioche can easily be made with a KitchenAid stand mixer which does all the work, giving your hands a rest and resulting in the most delicious Bread.  Of course, you can hand knead it if you like...but why?
When you are Cooking The Amazing it's all about the end result being the most delicious even if it's easy.


Here is the recipe.


1 T  Butter (To Butter the Bowl)
2 1/4 t  Dry Active Yeast (1 envelope)
1/3 c  Warm Water
6 c  Bread Flour
1/3 c  Sugar
2 1/2 t   Sea Salt, fine grain
6  Large Eggs
3  Large Egg Yolks
4  Sticks Butter (cold, no salt)
1/4 c  All Purpose Flour (to Flour the board)
1 Large Egg (for Egg wash)
1 T  Water (for Egg wash)


1.  Butter a large bowl to place the Dough in later with 1 T room temperature Butter and set aside.  In a small cup or bowl pour 1/3 c very warm water from the tap (about 110 degrees) and add the Yeast and stir.  Set aside to proof for 5-7 mins.  The Yeast will begin to bubble and increase in size.  This means it is alive and well.  If nothing happens the Yeast is not alive and won't make the Brioche rise.

2.  In the bowl of a KitchenAid mixer fitted with the dough hook, put the Flour, Sugar and Sea Salt.  Mix well for a couple minutes while the Yeast proofs.

3.  In a separate bowl, crack 6 large Eggs and add 3 Yolks from large Eggs and whisk well.  Set aside.


4.  Remove the cold Butter from the fridge and cut each stick into small cubes, about 1/2 inch square or so.  Set aside.

5.  Once the Yeast has proofed, turn the mixer on low and add the Yeast to the Flour mixture all at once then add the Egg mixture all at once.  Continue to mix on low.  The Dough will look dry and crumbly at first.

6.  Increase the speed of the mixer to medium speed and add 1/4th of the cold Butter.  Allow to mix for 15 secs. then add 1/4th more of the Butter.  Repeat every 15 secs. until all the Butter has been added.

7.  Continue to mix at this speed for 10 minutes allowing the cold Butter to incorporate.  The Dough will go from looking dry to looking sticky and finally to form a smooth large ball.  Scrape down the bowl often.  You may also need to wrangle the Dough from creeping up the Dough hook from time to time.

8.  After 10 mins. the Dough ball should be smooth.  Pull it from the Dough hook and place in the large Buttered bowl that you prepared earlier.  Cover very tightly with plastic wrap and refrigerate over night. 16 hrs. minimum but 24 hrs. is even better. 


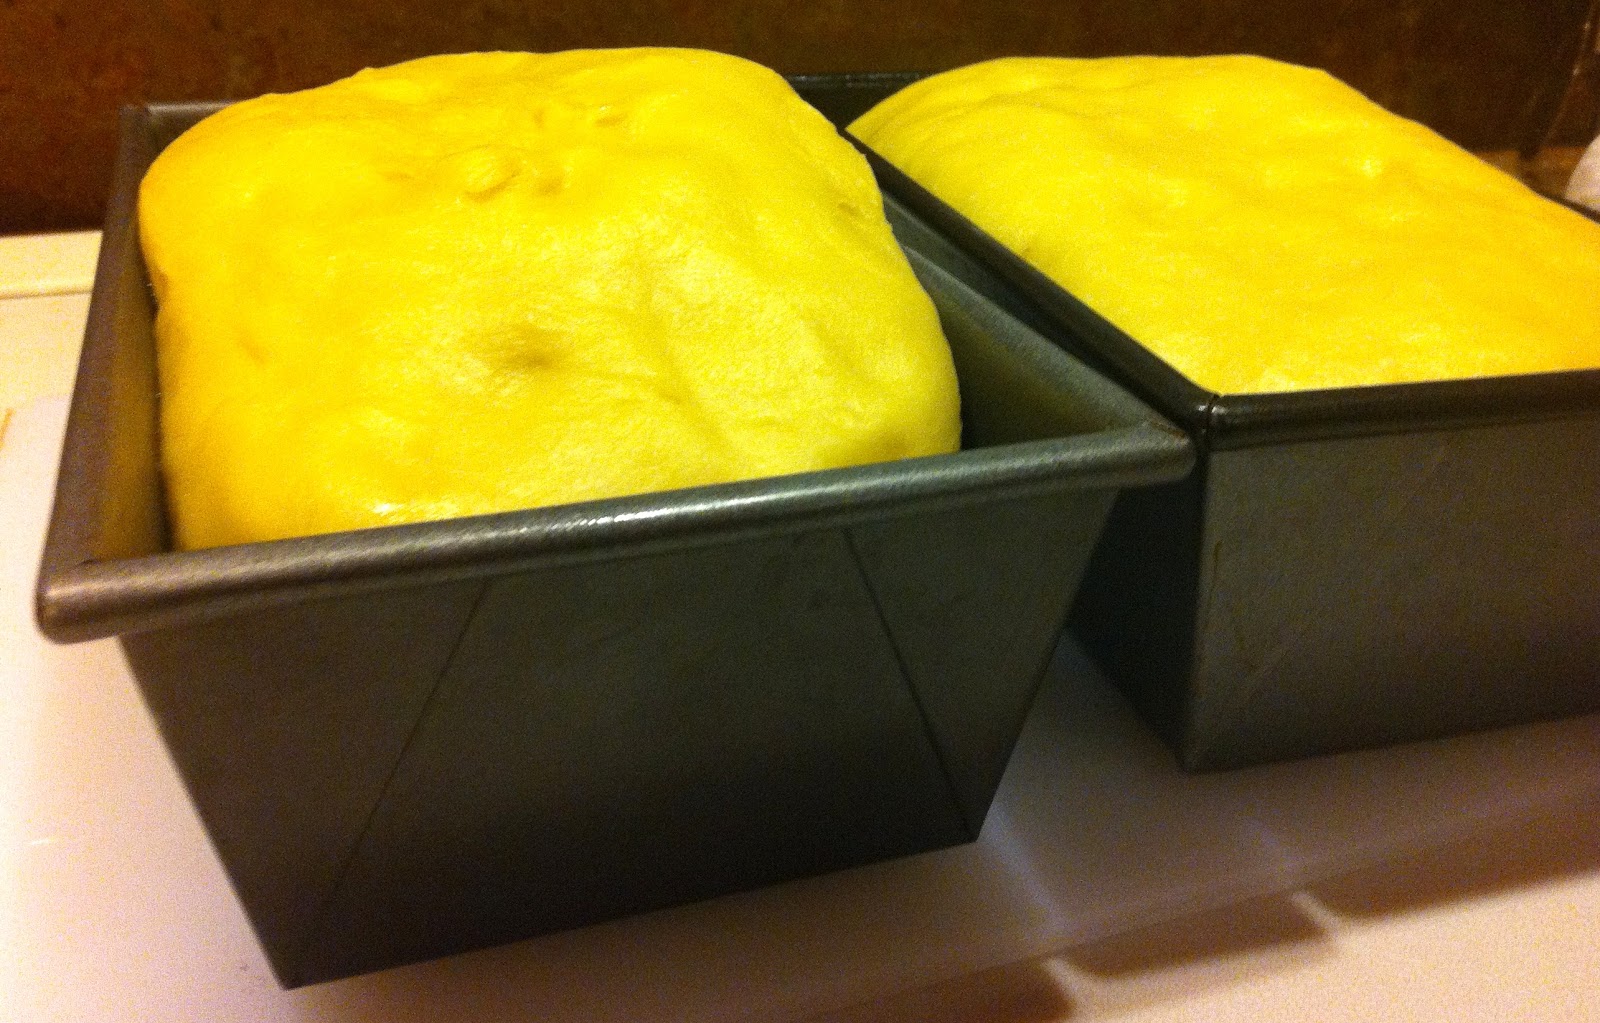
9.  The next day remove the Dough from the fridge and take the plastic wrap off.   The top of the Dough will look dried out and the the Dough will have increased in size, but not a lot.   Spray 2 loaf pans with non-stick Vegetable spray (like Pam).  Sprinkle about 1/4 c All Purpose Flour on a board and dump out the Dough on the Flour.  Cut the Dough in half and form into a rough loaf shape.   The Dough will feel heavy and dense.  Knead it for 1 minute to soften the Dough to make it workable.  If you are not making loaves, form the Dough into the shapes you want at this stage (as in roll out the Dough for Cinnamon Rolls or for small individual Brioche rolls).


10.  Place the shaped Dough into the prepared pans then cover with a kitchen cloth and place in a warm place and allow to rise, doubling in size, approx. 2-2 1/2 hours.  A trick I use is to turn my oven on to 200 degrees for a couple minutes then turn it off.  I open the door and let some of the heat out and check that it isn't too hot.  I put my loaf pans with my Dough in the oven with the door closed to rise for the 2-2 1/2 hrs.  This makes a nice warm protected spot.

11.  After the Dough has doubled in size, preheat the oven to 350 degrees.  (If you used your oven as a warm spot to rise, remove the risen Dough and set on the counter as the oven heats up.)  Score the top of the Dough gently with a sharp knife down the middle lengthwise.  Make the Egg wash: Mix one large Egg with 1 T Water in a small bowl and brush this mixture on the tops of the Dough.  This will give the Bread a beautiful shiny brown top crust.


12.  Bake at 350 degrees in the center of your oven for 50-55 minutes for loaves until the top is well browned.  Small Rolls bake for 25-30 minutes.
Tap the Bread on top listening for a hollow thump indicating it is done.  Immediately remove from the loaf pans and allow to cool on a wire rack.


Click here for an amazing Cinnamon Rolls Recipe  made from this Brioche Dough recipe or for the most delicious French Toast you will ever eat!


COPYRIGHT (c) 2011

February 11, 2011

RED VELVET CAKE


Want the perfect Valentine's Day dessert?  Or just a fun dessert for any time of the year.  Red Velvet Cake is an old fashioned Southern classic that has become the most popular Cake at bakeries across America.   It is know for it's vibrant bright red Cake and creamy Cream Cheese Icing, although there is much debate on what the original Icing should be.  You can easily use Vanilla Butter Cream Icing to top this moist Cake.   Original recipes also contained a small amount of Cocoa Powder and Vinegar.  In my recipe testing I found that neither one made a difference so I left them out of my recipe.   I also made mine more flavorful using more Extracts.   If you have a Sweetie that has a sweet tooth you can make them Red Velvet Cupcakes and swoon them all over again when you are Cooking The Amazing.


Here is the recipe.


1 1/2 Sticks Butter, unsalted, softened
1  3/4 c  Sugar
6  Egg Whites, From Large Eggs
1/4 t  Cream Of Tartar
1 c  Buttermilk
1/2 c  Sour Cream
1 T  Vanilla Extract
3 t  Almond Extract
1 oz  Liquid Red Food Coloring
2 1/2 c  Cake Flour (You may substitute All Purpose Flour but will be slightly more dense)
2 t  Baking Powder
2 t  Baking Soda
1 t  Sea Salt, fine grain


1.  Preheat your oven to 350 degrees.  Make sure you aren't wearing white clothes or any special clothes that you don't want to get Red Food Coloring on.  Prepare ahead:  Allow your Eggs and Butter to sit out at room tempertaure for a more fluffy Cake.

2.  Grease with Butter or spray with Pam, 3 Cake pans 8 inches round or fill 20 large Cupcake liners into Muffin tins.  Or 24-26 small Cupcake liners.  Line the Cake pans with parchment rounds or wax paper wounds on the bottom of the pans to ensure easy removal once baked.

3.  In the bowl of a stand mixer fitted with the whisk attachment or a large bowl with a hand mixer, place six room temperature Egg Whites and 1/4 t  Cream of Tartar and beat until you get stiff peaks.  Remove them from the bowl and set aside for later.  I don't even wipe out the bowl and continue on with the next step.  It all ends up in the cake anyway.

4.  In the bowl of a stand mixer with paddle attachment (switch out the whisk) or a large bowl with a hand mixer, beat the Butter for 2 minutes then add the Sugar and beat for 2 minutes more.


5.  Add the Buttermilk, Sour Cream, Vanilla Extract and the Almond Extract and mix for approx 2 mins.   It will look curdled.  Scrape down the bowl to be sure to get it well mixed with a rubber spatula.

6.  Then add the Red Food Coloring.   Mix it on low to prevent it flying out and staining you and your kitchen!
7.  In a large bowl mix all the dry ingredients using a whisk so that it is well incorporated.
8.  Slowly add the dry ingredients by sifting them over the wet ingredients then mix on low speed for a few seconds so the flour doesn't make a dust cloud in your face (I've done it a million times!) and then increase speed to medium for 2 minutes.  Scrape down the bowl half way through mixing.  Next fold in all of the Egg Whites until well incorporated using a rubber spatula.  Then divide Cake Batter between prepared cake pans or scoop into Cupcake Liners.

9.  For Cupcakes:  Using an Ice Cream scoop or large spoon fill Cupcake liners 1/2 way.  Do not fill higher or it will overflow during baking.
For Layer Cake:  Pour 1/3rd of the Batter into each prepared Cake pan. 

10.  Bake Cupcakes at 350 degrees in the center of the oven for 22-25 minutes.  Bake Cakes at 350 degrees for 25-30 minutes. 
The top center may look wet even though they are done.  Test using a toothpick.  If it comes out clean it is done.   Allow to cool in the pans for 1-2 hrs until completely cool before icing with your favorite Icing.


CREAM CHEESE ICING


2  Sticks Butter, unsalted, softened
16 oz.  Cream Cheese (2 bars) softened
3 c  Powdered Sugar
4 t  Vanilla Extract
1/4 t  Almond Extract
Pinch Sea Salt, fine grain (small pinch)


Total Prep Time: 7 minutes (except time to soften butter and cream cheese.)


1.  Allow Butter and Cream Cheese to sit out until at room temperature and softened.


2.  In a large bowl, place the softened Butter.


3.  Cream the Butter with a hand mixer for 2 minutes. Then add the Cream Cheese and cream for 2 minutes or so more until well mixed.


4.  1 cup at a time, add the Powdered Sugar and blend well.


5.  Add Salt, Vanilla and Almond Extracts and mix well.


6.  Keep Cream Cheese Icing at room temperature for the best consistency to ice cakes.


7.  Refrigerate unused icing. To use again, bring to room temperature then mix with a hand mixer for about 1 minute before using.


OPTION: For those that like a very strong Cream Cheese taste add another 4 oz. of Cream Cheese for a more intense flavor.


COPYRIGHT (c) 2011


February 2, 2011

ECLAIRS

Eclairs always stand out in the Pastry cases of fancy bakeries with their glossy Chocolate glaze over delicate Pate Au Choux and sweet silky Pastry Cream in the middle.  So, when I am am standing in front of one of those Pastry cases and trying to decide which one I want, I usually pick the Eclair.  And if I am by myself... maybe a couple other Pastries that know one needs to know about.  I could lie and say it is research for this recipe site but we all know the truth.  You can make your own Eclairs in just a few easy steps and serve them for a special Breakfast or romantic Dessert.   When you are Cooking The Amazing, making French Pastries like Eclairs can be easy and no one has to know how many you have eaten.


Here is the recipe.


1  recipe of Pastry Cream
1  recipe of Pate Au Choux
1  recipe of Chocolate Glaze


STEP 1:   Make the Pastry Cream.  The Pastry Cream needs to refrigerate for a minimum of 6 hours.  Doing this step first will give it plenty of time to set up.  Click HERE for the recipe.


STEP 2:  Make the Pate Au Choux.   During this step make sure you form the Dough into long shapes before baking to get the classic Eclair shape.   Click HERE for the recipe.  You can make this while the Pastry Cream chills.  Allow the Pate Au Choux to completely cool at room temperature before using.

STEP 3:  Make the Chocolate Glaze when you are ready to assemble the Eclairs.   The Glaze is delicious and easy to make.  Use the best Chocolate for best flavor.  Boil 1/2 c Heavy Cream and pour over 12 oz. of chopped Chocolate or Chocolate Chips and allow to sit for 5 mins.  Use a spoon and start mixing until the Chocolate and Cream are well mixed.  If the Chocolate is not completely melted, microwave for 30 secs. and remove and stir.  Repeat as necessary.  


STEP 4:  Assemble the Eclairs.   Remove the Pastry Cream from the refrigerator and stir it well.   Use a serrated knife and carefully split the Pate Au Choux shells in half lengthwise.  Line the bottoms of the shells on a tray and spoon in the Pastry Cream.  Dip the tops into the Chocolate Glaze then placed on top of the filled bottoms.  Allow the Glaze to set for approx 30-45 mins before serving or refrigerate in an air tight container.


COPYRIGHT (c) 2011

PASTRY CREAM/ VANILLA PUDDING


Pastry Cream is one of those master recipes that is used in many lusciously sweet and delicate Desserts and Pastries like Eclairs, Fruit Tarts, Napoleons and Cakes like Boston Cream Pie.  Pastry Cream is a homemade Vanilla Pudding that has a rich and silky feel in your mouth and an amazing creamy Vanilla flavor.  Serve as Vanilla Pudding with freshly Whipped Cream on top, layered between moist Chocolate Cake or spread on a flaky Tart Crust that's topped with fresh Berries and glazed with Apricot Jam.  Making delicious Desserts like these is easy when you are Cooking The Amazing

        
  Pastry Cream is that amazing filling in an Eclair.


Here is the recipe.

1 c  Whole Milk
1/2 c  Heavy Cream
1/2 c  Sugar
1 T Vanilla Extract
5  Large Egg Yolks
2 1/2 T  All Purpose Flour
pinch of Sea Salt, fine grain
1 T Butter


1.  In a large pot over medium heat bring the Milk, Heavy Cream and Sugar to a simmer.  Stir well so the Sugar dissolves, about 3-5 minutes.  Do not boil.  Take off the heat and add the Vanilla Extract by stirring in well then set aside.

2.  In a large mixing bowl whisk the Egg Yolks to break them up then whisk in the Flour and Sea Salt until the Flour is well incorporated.  About 1-2 mins.
3.  Slowly drizzle in about 1/2 c of the hot Milk/Cream mixture to the bowl of  the Egg Yolks mixture and immediately whisk it in to temper the Yolks for about 20 secs.  Then add the rest of the hot Milk/Cream mixture to the bowl and whisk well.  It will be very liquidy.

4.  Once well mixed, return the pot to the stove over medium heat.  Add the mixture and begin to whisk until it begins to boil and thicken, about 4-5 mins.  Scrape the bottom of the pot well as you whisk so it does not scorch.  Once it begins to boil, allow it to boil while whisking for 1 full minute.   Remove from the heat then add the Butter and whisk until the Butter is melted and well incorporated.
                                   
 5.  Strain the Pastry Cream through a fine strainer, pushing it through using a whisk or a rubber spatula into a medium bowl.  Any cooked egg will be left behind.  This will make it silky smooth.
6.  Cover the strained Pastry Cream with plastic wrap making sure it touches the top of the Pastry Cream surface so a skin does not form.  Refrigerate for a minimum of  6 hours before using.  Stir well once you take it out of the refrigerator before using to loosen it up.  It is now ready for your recipe or to eat as Vanilla Pudding just as it is... amazingly smooth and delicious.

COPYRIGHT (c) 2011