January 23, 2010

MACARONI AND CHEESE


Delicious Macaroni baked in a smooth and creamy Cheese sauce with a crisp Buttery topping.  Macaroni and Cheese is another "can't live without" classic American comfort food that is easy to make.  Making it the best is simple by using the best ingredients like good quality real Cheese and real Butter.  You can't get that from a box.  I use fresh Sour Dough Bread as part of the Buttery topping to make it taste even better.  When you bring a hot bubbling dish of Macaroni and Cheese to the table and your family and friends taste how incredible it is, they will know you are Cooking The Amazing.


Here is the recipe.


2 T  Butter, to grease baking pan
8 oz  (2 c dry) Dry Macaroni (or other pasta like penne, rotini, farfalle)
1 t  Sea Salt, to season water for Pasta
1/2  Stick  Butter, unsalted
1 Garlic clove, finely minced
3 T  Shallot, finely minced (may substitute Onion)
1/4 c  All Purpose Flour
1 c  Milk, whole
1 c  Heavy Cream
1/8  t   Nutmeg, ground
1 t  Sea Salt, fine grain
1 t  Pepper, black fresh ground
2 t  Thyme, dried or fresh
1 t  Dry Mustard Powder (mild)
2 c  Sharp Cheddar Cheese, grated (Preferably White Cheddar)(about 8 oz.)
1 c  Gruyere Cheese, grated (about 4 oz.)
1/2 c  Milk, whole
1 1/2 c  Sharp Cheddar, grated (about 6 oz.)
2 T  Parmesan Cheese, grated
1  1/2 c  Fresh Bread Crumbs (Sour Dough is best) or Panko Bread Crumbs
2 T  Butter, melted

 
Options:  You can add one or more of the following to the Cheese sauce:  Sautéed Mushrooms, Cooked Lobster, Diced Jalapeno Peppers, Diced Tomatoes, Cooked Sausage, Roasted Chicken, Ham Chunks or whatever you like to make it your own.


1.  Preheat oven to 375 degrees.  Butter a very large baking dish or deep casserole dish or foil pan.  Use a cookie sheet under your baking dish to make transfer easier and safer and to catch any dripping while it cooks.  Prepare all the ingredients above for the recipe.


2.  Bring a large pot of water to boil on the stove then add 1 t Salt to water then add the Pasta and boil until just cooked.  Test it at 6-7 mins for doneness.  Do not over cook.


3.  While Pasta boils, in a large pot melt 1/2 stick of Butter on medium heat.  Then saute the minced Garlic and Shallot (or onion) for 1 minute.


4.  Add the Flour to the melted Butter and whisk well for 2 minutes.  Keep the Garlic and Shallot moving so they do not burn and scrape the bottom of the pot well  as you whisk to prevent scorching.


5.  Turn the heat up to medium high on the flour butter mixture and add 1 cup  Milk and 1 c Heavy Cream whisking rapidly until it begins to boil.  While constantly whisking, allow to boil 1 minute making sure to scrape the bottom of the pot to keep from scorching. 


6.  After 1 minute of boiling reduce heat to medium low and add the Nutmeg,  Salt, Pepper, Thyme, Mustard Powder and continue to whisk for 2 minutes then remove from heat.  Add the 2 c mild Cheddar and 1 c  Gruyere grated Cheeses to the pot and stir in well until cheese is melted and well incorporated, about 3 minutes off heat.  Taste for need for Salt and Pepper and add as needed.  Now add the remaining 1/2 c of Milk by whisking until well mixed.
*Nutmeg is a classic white sauce ingredient that will add just a background taste that enhances the sauce.


7.  Drain the Pasta very well and combine with the Cheese sauce and mix well then transfer to the baking dish.  Cover with 1 1/2 c  Sharp Cheddar Cheese. 


8.  Melt 2 T Butter and combine with Grated Parmesan Cheese and Fresh Bread Crumbs (Sour Dough is best but any good Bread will work) or Panko Bread Crumbs fluffing with a fork.  To make fresh bread crumbs place 5-6 slices of Fresh Bread without crusts into a food processor and pulse until fine.  Panko Bread Crumbs are found in most grocery stores near the regular dried bread crumbs or in the Asian food section usually in a bag.  Sprinkle over the Macaroni and Cheese evenly and place in a 375 degree oven for 25 minutes.


9.  To make the top bubbly and brown, place under the Broiler on High for 1-2 minutes watching VERY closely because it can burn quickly.  Remove just as it browns evenly on top.


10.  Allow rest uncovered to set up for 5 minutes before serving. 

TIP:   Pan fry 6 strips of bacon until crisp then drain fat and crumble onto the top of the baking macaroni and cheese the last 10 minutes of cooking.


TIP:  Use finely crushed crackers (Such as Ritz) in place of the bread for the topping as an option.


COPYRIGHT (c) 2010


January 14, 2010

CLASSIC BEEF STEW


BEEF STEW

Classic Beef Stew is a true one pot meal that is hearty, satisfying and will warm you up on the coldest day.   When it comes to comfort foods Beef Stew is a favorite because it has something for everyone, tender flavorful beef, sweet carrots and rib sticking potatoes that have stewed in a delicious gravy.  The familiar smell of stewing beef and vegetables brings everyone to the kitchen wondering when dinner will be ready.  I like to cut the Meat and Veg into large chunks because when you cook the Stew long and slow it will not cook down to mushy unidentifiable mystery bits.  A Potato should look like a Potato in your Stew, not baby food.   Make a big pot of Beef Stew and save some for left overs because we all know it is even better the next day when you are Cooking The Amazing.


Here is the recipe.


2 1/2 lbs. Beef Roast (Chuck or Butt is best)(Pick a roast with fat marbled in it.)
3/4  c  All Purpose Flour
1  t  Sea Salt, fine grain
1  t  Pepper, black fresh ground
4 T  Olive Oil
4 c   Hot Water
1/2 c  Red Wine (such as Cabernet Sauvignon)
3 T  Tomato Paste
4 T  Beef Base (The best is "Better Than Bouillon" Brand see below)
1 T  Worcestershire Sauce
2   Onions, Medium size
5  Potatoes, Yukon Gold, Large size (or 10 small)
3  Carrots, large
4  Cloves Garlic
1 t  Oregano, dried
2 t Thyme, dried
2  Bay Leaves
1 t  Black Pepper, black fresh ground
1 t  Sea Salt, fine grain
Optional:  8 oz. Fresh White Mushrooms, halved

Total Prep and Cooking time:  Approx 4 hours


1.  Preheat oven to 300 degrees.

2.  Use a heavy bottomed pot, like an enameled cast iron pot (like Le Creuset brand), to cook this in.  A thin flimsy pot will cause burning on the bottom and will ruin the flavor of  your stew.

3.  Cube the Roast into large 2 inch square chunks, trimming the fat off as you go from the outside.  Reserve the fat pieces to render later.

4.  Add the Olive Oil to your heavy bottomed pot and place over medium heat on the stove top and allow to heat up.

5.  Place the fat pieces you saved into the hot oil and begin to brown, stirring with a spoon for about 5 minutes.  Then remove all the fat pieces and reserve all the rendered fat in the pot.  Rendering this fat will bring maximum flavor to your stew.   Allow the rendered fat to stay heated in pot.

6.  Place all the Beef chunks in a large zip lock bag with Flour, 1 t Salt and 1 t Black Pepper.  Seal the bag tight then shake until well coated.

7.  Keep the heat of the fat in the pot at medium and dump 1/2 the flour coated Beef and any left over Flour into the pot.  Brown the Beef in 2 batches so that it does not steam but gets a good brown crust.


8.  Stir immediately with a large spoon to coat Beef with fat then allow to brown.  The Beef and flour will form a pasty coating.  This is important:  The Beef needs to brown well on all sides to develop full flavor potential.  Skipping this step will give you a less flavorful stew.  Let the meat brown before turning to the next side.  You are not fully cooking the meat.  This will take about 10-15 minutes to brown well.  Remove the beef and set aside when browned leaving any fat and cooked bits stuck to the bottom pot.  (While Beef is browning you can prep the vegetables.) Add more Olive Oil if needed and brown the second batch of Beef.  Then set aside with the first batch. 

9.  Peel the Potatoes and cut into quarters.  Peel Carrots and cut into large 2 inch chunks and peel and cut the onions into 8 piece chunks.  Peel garlic and chop into small pieces.  Set all aside.  By cutting in large chunks you will avoid "baby food" stew once cooked.

10. In a measuring cup, measure 1 cup of hot water from the tap.

11. Add the Tomato Paste, Beef Base, and Worcestershire Sauce to the 1 c of hot water and stir until dissolved.  See TIP below for more about Beef Base.  The pot should have a brown bits stuck to the bottom of the pan.  This is a lot of flavor that needs released by deglazing.

12. Pour this mixture into the empty pot and turn the heat up to high on the stove.  Using a wooden spoon, scrape up all the cooked bits on the bottom of the pan.  There is a lot of flavor in the cooked bits.  Scrape well while it starts to boil until the bottom is clean.  Add the 1/2 c Red Wine and stir.  Then add 3 cups of hot water and bring to the boil.

13. Once all the water is boiling, add the beef back into the pot and all the chopped vegetables, Oregano, Thyme, Bay Leaves, Sea Salt and Pepper.  Stir well.

14. Bring to the boil then reduce heat to Medium and allow to simmer for 5 minutes covered.  Add optional Mushrooms cut in half now if using.

15. After 5 minutes remove from the stove and place in the center of the oven and cook 3 hours at 300 degrees with the lid on tight.  Don't peek.

16. After 3 hours total cooking in oven remove from the oven.  Very gently stir and taste for Salt and Pepper.  Season as needed and stir.  Allow fat to come to surface and skim off.

17. Allow the Stew to sit with the lid off for 10 minutes before serving.  Remove the Bay Leaf before serving.  This is a choking hazard.

18. Serve with crusty bread and a simple green salad.


TIP:  "Better Than Bouillon" brand beef base is made with beef and vegetables in a concentrated form that is a million times better than boxed beef broth or those little salty squares of beef bouillon which taste more like salt than beef.  It is found in the grocery where the little square beef bouillon boxes are in an 8 oz jar.  It is available in organic also.


COPYRIGHT (c) 2010
    

January 7, 2010

CARROT CAKE


CARROT CAKE

Classic Carrot Cake with hints of cinnamon and clove made super moist by pineapple as a secret ingredient.  Carrot Cake is fast becoming the most requested cake for wedding cakes because of it's tasty universal appeal.  And with Carrots as the main ingredient you could even say it is healthy.  Well, almost.  When you ice it with my amazing Cream Cheese Icing you will have an incredible combination of flavors that are both classic and proof you are Cooking The Amazing.


Here is the recipe.


2 c   All Purpose Flour
1 1/2 c   Sugar
1/4 c   Brown Sugar, packed (dark or light)
1  1/2 t   Baking Soda
1 t   Baking Powder
1 t  Salt
4 t  Cinnamon
1/4 t  Nutmeg
1/8 t  Ground Cloves 
1/4 t  Ground Ginger
2 c  Finely Grated Peeled Carrot, packed
1 c  Coconut Flakes, sweetened
1 c  Raisins (Optional)
1 can 8 oz  Crushed Pineapple, drained
       (reserve 1 T of drained Pineapple juice)
1 1/2 c  Walnuts or Pecans, chopped small pieces
1 c  Vegetable Oil
2 t  Vanilla Extract
1 T  Finely Grated Fresh Orange Zest
3  Eggs, extra large
Pam non stick Cooking Spray

Total Prep and cooking time approx. 1 1/4 hr.
Total Cooling and Icing time approx. 2 1/2 hrs


  1. Preheat oven to 350 degrees.

  2. Prepare two 9 inch cake pans by spraying with Vegetable non-stick spray (like Pam Spray) and line with a parchment paper round on the bottom then spray the top of the parchment.  Or spray a 9 X 13 baking pan with Vegetable non stick spray (like Pam Spray) or use 20 jumbo Cupcake liners in a Muffin tin without using Pam spray.

  3. In a large bowl whisk well:  Flour, Sugar, Brown Sugar, Baking Soda, Baking Powder, Salt, all Spices.

  4. Peel then Grate approx 5-6 medium Carrots to yield 2 cups packed.  Grate Carrots finely to no more than 1/4 inch pieces.  Or process in a food processor until finely grated but not mush.  It is important that you peel the Carrots before grating.  You do not want the tough skins in your cake.

  5. In a medium bowl or KitchenAid bowl add Carrots, Grated Fresh Orange Peel, Drained Pineapple, Raisins (optional), Coconut Flakes, Walnuts or Pecans and mix well with a big spoon.

  6. To this mixture add the Vegetable Oil, Vanilla Extract and Eggs one at a time mixing in well then add 1 T of the reserved Pineapple juice and mix well.  Scrape down bowl often.

  7. Slowly add the wet ingredients to the dry ingredients and mix with a hand mixer or Kitchen Aid for  about 1 minute until well mixed.  Do not over mix.

  8. Pour divided into prepared (as above) 9 inch cake pans, or 9 X 13 pan, or approximately 20 Cupcake liners filled 3/4 full or a 9 X 13 baking sheet sprayed with Pam but no parchment paper needed. 

  9. Bake at 350 degrees for 25-30 mins for Cupcakes,  35-40 minutes for 9 inch layer cakes and 45-50 mins for 9 X 13 in the center of the oven.  Half way through cooking rotate the pans for even cooking.  A toothpick will come out clean when done.  All ovens vary in timing so check at lowest time first and if not done put back in oven and recheck in 2- 3 minutes.

  10. Allow to cool completely in pan for 1-2 hrs. before removing to ice with Cream Cheese Icing.  Recipe below.  Place 1/4 of icing between the two layers and when placing the top cake layer on, put the flat side of the cake (the bottom when it was in the cake pan) facing up for a flat top which makes a more attractive cake and easier to ice.

This cake is super moist and fragile so handle with care when removing from pans and icing.  If it breaks the icing will hide any imperfections.

TIP:  Add 1 cup of golden raisins or chopped dried cherries or apricots for a twist on tradition.

TIP:  Black Walnuts will give this cake the most flavor.  Sprinkle the top of the cake with Walnuts or Pecans as a tasty garnish.


CREAM CHEESE ICING


Here is the recipe.


2 sticks Butter, unsalted, softened
16 oz. Cream Cheese, softened (2 bars)
3 c Powdered Sugar
4 t Vanilla Extract
1/4 t Almond Extract
1 small pinch Salt (very small pinch)


Total Prep Time: 7 minutes (except time to soften butter and cream cheese.)


  1. Allow Butter and Cream Cheese to sit out until at room temperature and softened.
  2. In a large bowl, place the softened Butter.
  3. Cream the Butter with a hand mixer for 2 minutes. Then add the Cream Cheese and cream for 2 minutes or so more until well mixed.
  4. 1 cup at a time, add the Powdered Sugar and blend well.
  5. Add Salt, Vanilla and Almond Extracts and mix well.  Taste and add more Powdered Sugar to be more sweet or more Cream Cheese to suit your taste.
  6. Keep Cream Cheese Icing at room temperature for the best consistency to ice Cakes.
  7. Refrigerate unused icing. To use again, bring to room temperature then mix with a hand mixer for about 1 minute before using.
  8. OPTION: For those that like a very strong Cream Cheese taste add another 4 oz. of Cream Cheese for a more intense flavor.


COPYRIGHT (c) 2010


January 6, 2010

CREAM CHEESE ICING


CREAM CHEESE ICING


 A really good Cream Cheese Icing truly is the "Icing on the Cake".   This recipe is a version of my Butter Cream Icing that blends rich cream cheese into sweet Butter Cream with just the right amount of vanilla.  Cakes like Pumpkin Spice and Carrot traditionally are layered with Cream Cheese Icing to compliment their spice and richness.    Cooking The Amazing comes easy when a delicious icing takes just minutes and tastes better than you can imagine.


 Here is the recipe.


2   sticks Butter, unsalted, softened
16 oz. Cream Cheese, softened (2 bars)
3 c  Powdered Sugar
4 t  Vanilla Extract
1/8 t  Almond Extract
1 pinch  Salt (very small pinch)
Total Prep Time: 7 minutes (except time to soften butter and cream cheese.)


  1. Allow Butter and Cream Cheese to sit out until it is room temperature and softened.
  2. In a large bowl, place the softened Butter.
  3. Cream the Butter with a hand mixer for 2 minutes.  Then add the Cream Cheese and cream for 2 minutes or so more.
  4. 1 cup at a time, add the Powdered Sugar and blend well.
  5. Add Salt, Vanilla and Almond Extracts and mix well.  Taste and add more Powdered Sugar for more sweetness or more Cream Cheese to meet your own tastes.
  6. Keep Cream Cheese Icing at room temperature for the best consistency to ice cakes.
  7. Refrigerate unused icing. To use again, bring to room temperature then mix with a hand mixer for about 1 minute before using.
  8. OPTION:  For those that like a very strong Cream Cheese taste add another 4 oz. of Cream Cheese for a more intense flavor.


COPYRIGHT (C) 2010

January 5, 2010

COCONUT CAKE


Easter Schmeaster!  Why wait for a holiday to eat delicious Coconut Cake.  This amazing Coconut Cake is made with sweet flakes of Coconut and moist Cake iced with creamy Coconut Butter Cream.  This Cake is versatile but never complicated.  You can make Cupcakes or a layer Cake with rich Pastry Cream in the middle.  When you are Cooking The Amazing this delicious cake will be center stage on your dessert table, holiday or not.   


Here is the recipe.


1 1/2  sticks Butter, unsalted, softened
1  2/3 c  Sugar
1/2 c  Buttermilk
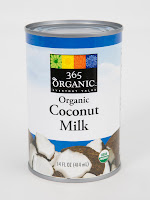
1/2 c  Coconut Milk or Cream, canned (NOT Coco Lopez) (More Buttermilk can also be substituted)
1 c  Sour Cream
1 t  Vanilla Extract
1/2 t  Almond Extract
1 T  Coconut Extract
6 Egg Whites, from large Eggs
1/4 t  Cream of Tarter
2  1/2 c  Cake Flour (You may substitute All Purpose Flour but will be slightly more dense)
2 t  Baking Powder
2 t  Baking Soda
1 t  Sea Salt, fine grain
Butter to grease pans
1 Recipe of Coconut Butter Cream (see below)
24 oz.  Coconut Flakes, sweetened


TIP:  Coconut Milk (sometimes labeled as Coconut Cream on the can ) is usually found in the Asian Foods isle of your market.  Whole Foods has their own Organic brand which is good.  Do not get the Light Coconut Milk for this recipe.


1.  Preheat oven to 350 degrees.  Plan ahead: Use room temperature ingredients for the fluffiest Cake.

2.  Butter two 9 inch Cake pans then line with parchment paper rounds in the bottom.  Butter the top of the parchment papers.  Or place 24 Cupcake liners in muffin tins.

3.  In the bowl of a KitchenAid or large mixing bowl  with a hand mixer, cream softened Butter and the Sugar for 4 minutes, scraping down the bowl frequently.  It will be grainy.
4.  To the creamed Butter and Sugar mixture add the Buttermilk, Coconut Milk, Sour Cream, Vanilla Extract, Almond Extract and Coconut Extract and mix well with a hand mixer or KitchenAid.  

5.  In a separate large bowl using a hand mixer, whip the Egg Whites and the Cream of Tarter into stiff peaks. About 3 minutes and set aside.

6.  In a separate medium bowl (I know, another bowl to clean, but this Cake is worth it.) sift the Cake Flour, Baking Powder, Baking Soda, Sea Salt and then whisk well to combine.  It is important to lighten the Flour and make sure the Baking Soda and Powder are well distributed.
7.  Pour the dry ingredients into the bowl of wet ingredients and mix for about 1 minute until no flour is seen.  Be careful not to over mix. 
8.  Add 1/3 of the whipped Egg Whites to the mixture and mix in to lighten the batter using a rubber spatula.  Then add the rest of the whipped Egg Whites and fold it in using a rubber spatula.

9.  Pour cake batter mixture into the prepared cake pans divided equally and place into the center of the preheated oven and bake for 22-25 minutes or until a toothpick comes out clean from the center of the cake.  Check the the cake at 22 minutes.  If not done, place back into the oven and continue to bake checking again in 1 minute intervals until a toothpick comes out of the center of the cake clean.  The cake will be very lightly browned in color.

10.  For Cupcakes, fill Cupcake liners 1/2 way up and bake for 19-22 minutes at 350 degrees until a toothpick comes out clean and tops are lightly browned.  * Don't overfill liners or they will over flow.  Makes 22-24 Cupcakes.
11.  For layer cake: Allow to rest in the pan for 1 hour before removing to cool to room temperature.  This is a very moist and fragile cake so handle with care.
12.  Make a recipe of Coconut Butter Cream. (see below)

13.  Cover the first layer of cake with 1/4 of the Coconut Butter Cream and sprinkle with 1/4 of the Coconut Flakes.  Layer the other cake on top (flat side up) and ice the entire cake.  Then cover the entire outside of the cake with rest of the Coconut Flakes.  For Cupcakes pipe a large amount of Icing then pack Coconut Flakes on by hand.  For a decadent Cake you can layer the Cake with rich  Pastry Cream.
14.  This Cake can be refrigerated, covered well, and then brought to room temperature before eating if you are not serving it the same day.

TIP:  For a Chocolate Coconut Cake, make this cake using the Chocolate Cake recipe.  Or make with the cake recipe above and fill the middle of the layers with 1/2 a recipe of whipped Ganache.  Add almonds to remind you of your favorite candy bar.


TIP:  Toast the Coconut in a 350 degree oven on a cookie sheet until the edges begin to brown.  Watch it close, it can burn quick.


COCONUT BUTTER CREAM ICING


4 1/2  sticks Butter, unsalted, softened

5 c  Powdered Sugar

2 T  Milk

2 t  Vanilla Extract

1/4 t  Almond Extract

5 t  Coconut Extract (add more to suit your taste if desired)
1  pinch Salt (very small pinch)

Total Prep Time: 5 minutes (except time to soften butter.)

  1. Allow Butter to sit out until it is room temperature and softened.
  2. In a large bowl, place the softened Butter.
  3. Cream the butter with a hand mixer for 4 minutes.
  4. 1 cup at a time, add the Powdered Sugar and blend well.
  5. In a small bowl, add Milk, Salt, Vanilla, Coconut and Almond Extracts and mix well.
  6. Begin mixing the Butter and Powdered Sugar mixture again and add the liquid Milk and Extract mixture until mixed in well, approx 2 mins.
  7. Keep Butter Cream Icing at room temperature for the best consistency to ice cakes.
  8. Refrigerate unused icing. To use again, bring to room temperature then mix with a hand mixer for about 1 minutes before using.


COPYRIGHT (c) 2010